Design.Wine.Dine.

  • About
  • Design
    • Interiors
    • Events
    • Floral
  • Wine
    • Cocktails
  • Dine
    • Fall
  • Life
  • Travel
  • Contact
  • Facebook
  • Instagram
  • Pinterest

ONEHOPE Holiday Party

January 8, 2014

Decor J Wiley Photography ONEHOPE -1014

Helloooo!  Are you staying warm out there?!  I can not believe the news coming out of the midwest and east coast!  I’m slightly jealous that I’m not there to witness the biggest snow storm in DECADES (my inner 10 year old self would do anything for a snow day), but I’m also thrilled at the fact that I’m not there to experience the super cold temperatures.  I think the lowest I’ve experienced is a wind chill of 18 below and I never want to face that again.  I feel you, ‘Merica!  Stay warm!

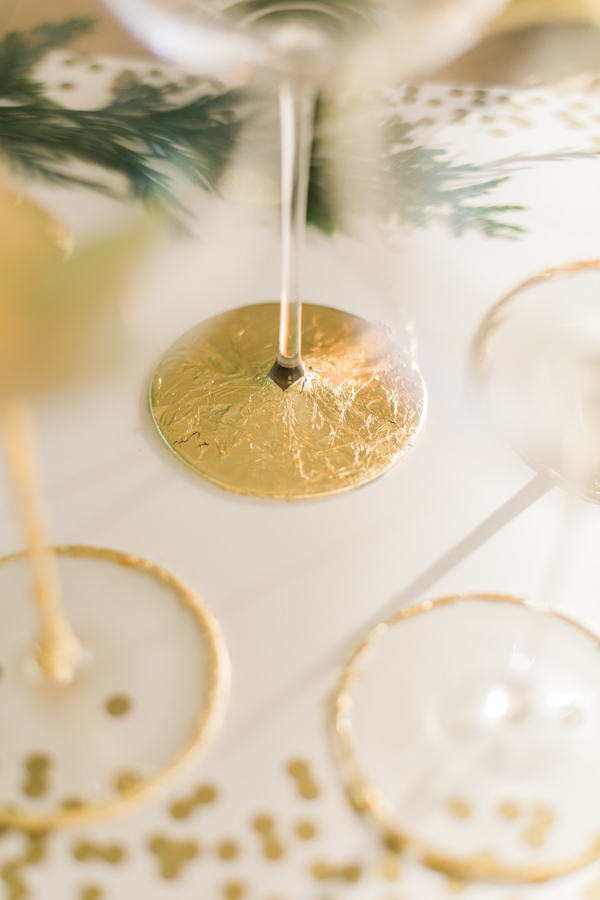
I REALLY wanted to share all of our ONEHOPE Holiday (#ONEHOPEHoliday) images before Christmas for anyone searching for last minute inspiration, but as I detailed previously, that just couldn’t happen this year.  Since half of the country is facing winter to the max, I thought I’d still share this little winter wonderland transformed office conference room in case you’re planning a snowy get-together.  The second half of the images are of the DIY we did that day where we gold-leafed our own glassware.  It was really fun and the results were so unique and gorgeous… definitely something creative and different to do with your girlfriends if you ever feel like having a ladies night in 🙂  I apologize in advance for there being tons of pictures, but I just could not narrow them down further.  We had an absolutely amazing photographer, Jen Wiley who crushed it for us.  I usually shoot most of our content, but knew that we needed a professional for a project of this magnitude and Jen was SO nice, so receptive, so creative… I could not have asked for anyone better.  She captured the day perfectly and didn’t miss a SINGLE detail.  If you’re on the market for a wonderful photographer, hire her. Now 🙂

PS:  If you’re new to Design Wine Dine and are interested in the background story of why I planned this little holiday get-together, check out my reasoning and inspiration board for the party and decor here.  Also, I had this crazy vision in my mind that included a pallet wall, but we didn’t have one at our office… so I made one.  Unfortunately, I was in such a rush to get it done that I didn’t document a lot of the process, but will break it down step by step and put it up here soon.  Stay tuned!

Decor J Wiley Photography ONEHOPE -1010

Decor J Wiley Photography ONEHOPE -1001

Decor J Wiley Photography ONEHOPE -1002

Decor J Wiley Photography ONEHOPE -1003

Decor J Wiley Photography ONEHOPE -1005

Decor J Wiley Photography ONEHOPE -1006

Decor J Wiley Photography ONEHOPE -1007

Decor J Wiley Photography ONEHOPE -1009

Decor J Wiley Photography ONEHOPE -1011

Decor J Wiley Photography ONEHOPE -1012

Decor J Wiley Photography ONEHOPE -1013

Decor J Wiley Photography ONEHOPE -1014

Decor J Wiley Photography ONEHOPE -1015

Decor J Wiley Photography ONEHOPE -1016

Decor J Wiley Photography ONEHOPE -1017

Decor J Wiley Photography ONEHOPE -1020

Decor J Wiley Photography ONEHOPE -1022

Decor J Wiley Photography ONEHOPE -1023

Decor J Wiley Photography ONEHOPE -1026

Decor J Wiley Photography ONEHOPE -1027

Decor J Wiley Photography ONEHOPE -1028

Decor J Wiley Photography ONEHOPE -1028-2

Decor J Wiley Photography ONEHOPE -1030

Decor J Wiley Photography ONEHOPE -1031

Decor J Wiley Photography ONEHOPE -1032

Decor J Wiley Photography ONEHOPE -1033

Decor J Wiley Photography ONEHOPE -1039

Decor J Wiley Photography ONEHOPE -1046

Decor J Wiley Photography ONEHOPE -1047

Decor J Wiley Photography ONEHOPE -1048

Decor J Wiley Photography ONEHOPE -1049

Decor J Wiley Photography ONEHOPE -1053

Decor J Wiley Photography ONEHOPE -1057

Decor J Wiley Photography ONEHOPE -1059

Decor J Wiley Photography ONEHOPE -1061

Decor J Wiley Photography ONEHOPE -1065

Decor J Wiley Photography ONEHOPE -1066

Decor J Wiley Photography ONEHOPE -1067

Decor J Wiley Photography ONEHOPE -1068

DIY Information

Supplies

  • Flutes or Champagne Coups – We used these and these to give our guests a little variety.
  • Gold leaf, adhesive and sealant (available at craft stores)
  • Paint brushes

Directions

  • Using a paint brush, apply adhesive to the glass.  Get creative with shapes and stripes!
  • Wait a few minutes until the glue gets tacky (2-5 minutes).  We had the best luck when the glue was almost dry.
  • Place your gold leaf on the glass and press down to smooth out any bubbles or inconsistencies.  Allow your gold leaf to set for 15-20 minutes.
  • Carefully remove excess gold leaf from around the glued areas.
  • Once all excess gold leaf is removed, brush your sealant on over the gold leaf.  This will allow you to drink out of and handle the glasses.  Since your glasses are hand crafted with love, please hand wash them with care

DIY J Wiley Photography ONEHOPE -2003

DIY J Wiley Photography ONEHOPE -2005

DIY J Wiley Photography ONEHOPE -2008

DIY J Wiley Photography ONEHOPE -2009

DIY J Wiley Photography ONEHOPE -2010

DIY J Wiley Photography ONEHOPE -2011

DIY J Wiley Photography ONEHOPE -2012

DIY J Wiley Photography ONEHOPE -2014

DIY J Wiley Photography ONEHOPE -2015

DIY J Wiley Photography ONEHOPE -2016

DIY J Wiley Photography ONEHOPE -2017

DIY J Wiley Photography ONEHOPE -2018

DIY J Wiley Photography ONEHOPE -2019

DIY J Wiley Photography ONEHOPE -2022

DIY J Wiley Photography ONEHOPE -2023

DIY J Wiley Photography ONEHOPE -2024

DIY J Wiley Photography ONEHOPE -2026

DIY J Wiley Photography ONEHOPE -2027

DIY J Wiley Photography ONEHOPE -2028

DIY J Wiley Photography ONEHOPE -2030

DIY J Wiley Photography ONEHOPE -2031

DIY J Wiley Photography ONEHOPE -2032

DIY J Wiley Photography ONEHOPE -2033

DIY J Wiley Photography ONEHOPE -2033-2

DIY J Wiley Photography ONEHOPE -2037

DIY J Wiley Photography ONEHOPE -2038

DIY J Wiley Photography ONEHOPE -2039

DIY J Wiley Photography ONEHOPE -2040

DIY J Wiley Photography ONEHOPE -2041

DIY J Wiley Photography ONEHOPE -2042

DIY J Wiley Photography ONEHOPE -2043

DIY J Wiley Photography ONEHOPE -2044

DIY J Wiley Photography ONEHOPE -2047

DIY J Wiley Photography ONEHOPE -2048

DIY J Wiley Photography ONEHOPE -2049

DIY J Wiley Photography ONEHOPE -2050

DIY J Wiley Photography ONEHOPE -2051

DIY J Wiley Photography ONEHOPE -2052

DIY J Wiley Photography ONEHOPE -2053

DIY J Wiley Photography ONEHOPE -2054

Wine: Hope at Home
Coffee: ONEHOPE Coffee
Linens: La Tavola
Gold rimmed glasses and ghost chairs: Classic Party Rentals
Deer Head: ZGallerie 
Frames: West Elm
Event/Floral Design and Production: Me!
Calligraphy: Beth Phillips at ONEHOPE
Photography: JWiley Photography

Design, Dine, Interiors, Wine Tagged With: christmas, DIY, gold, gold leaf, holidays, tutorial

Holiday Table Inspiration

December 29, 2013

ONEHOPE Holiday Table Final Flattened

Faux Sheepskin – Ikea |  Confetti Placemats – Kitchen Papers  |  Hurricanes – West Elm  |  Cedar garland for table – Available at most wholesale flower marts | Clear glass candlesticks – CB2  | Hanging candle holders – CB2  |  Deerhead – ZGallerie  |  Chargers – Assorted from Michael’s and ZGallerie  | Reclaimed wood wall – Pallet wood DIY (details coming soon) | New York White Sequined Linen – La Tavola  |  Gold Rimmed Glasses – West Elm  |  Votives – Jayson Home and Garden (no longer available but similar here)

___

Happy, Happy Holidays!!!  I hope everyone is having some much deserved down time and rest while gearing up for 2014!  I think it’s going to be a big one and I’m actually super excited to see what the new year holds 🙂  So, without getting too distracted, I REALLY wanted to get this published before Christmas, but if you follow me on Instagram, you might have seen what a ridiculously chaotic yet successful December we had over at ONEHOPE Wine.  We more than quadrupled our sales over last year and we had an all-hands-on-deck situation for most of December.  Instead of dabbling in anything creative, I was with the majority of our team in our warehouse packing boxes, sourcing product that we’d run out of (eeeek!) and helping to load hundreds upon hundreds of boxes onto multiple UPS trucks daily.  The experience of seeing our company grow like that and watching all of our hard work finally pay off was nothing short of incredible and I wouldn’t change being there, smack dab in the center of it for anything in the world 🙂

In early December, I posted a few sneak peeks from our ONEHOPE Holiday party (#ONEHOPEHoliday) at work. Since the wine industry is absolute madness in December every year, in 2012 we didn’t plan anything fun during the holidays. It was the first year that I really felt that the holidays just slipped through my fingertips and it bummed me out beyond belief. I wanted to make sure that didn’t happen again this year and planned an afternoon for the girls on our team to spend some time together outside of the work madness to decompress and do something fun. We played Christmas music, did a little wine tasting and gold leafed glasses to give away as gifts… It was just what we needed. Since we were going to have a photographer there to capture it as a DIY, I wanted to make sure that we gave our conference room a little TLC and turned it into a winter wonderland. I am SO HAPPY with how it turned out and can not wait to share the images our amazing photographer captured.  In the meantime, take a look at my inspiration board for the project 🙂

PS: I know Christmas is over, but I truly believe that so many Christmasy pieces can be carried into New Years Eve/Day parties.  So, recycle that garland, grab some gold confetti and wintery fur and enjoy your seasonal decor for a few more days!  If you’re not diggin’ it, keep this in your back pocket for next year 😉

xoxo

Meg

Design, Dine, Floral, Interiors, Wine Tagged With: christmas, decor, gold, green, holiday, home, inspiration, new years, nye, office, table, tablescape, wedding, work

My Work on Style Me Pretty Living

November 29, 2013

Happy Thanksgiving Weekend!!!  Following a grueling drive from LA to SF on Wednesday, Jake and I were so happy to have arrived in one piece in time for a wonderful Thanksgiving with family and friends.  It has truly been a tremendous year that has flown by, but aside from feeling a little huge over-indulged at the moment, my heart is full knowing that those around us (as well as ourselves) are healthy, happy and on their way to big things.  On the business side, I could not be more grateful to Style Me Pretty Living for featuring a cocktail I created for work this fall.  It was one of my favorites that we did and is something light and refreshing to enjoy this weekend… a little change of pace following the holiday yet it’s still bursting with fall flavor and won’t disappoint 🙂 If someone told me 6 years ago as an International Relations major in Michigan itching for some ounce of creativity in my life, that I would be designing, styling and photographing fun spreads for a living, I never would have believed them.  Seeing this feature was definitely a pinch me moment of gratitude.  Here’s to a wonderful weekend filled with thanks and reflection.  Cheers!

IMG_9927

IMG_9939

IMG_9940

IMG_9945

IMG_9951

IMG_9963

IMG_9964

IMG_9999

IMG_0001

Pear and Sparkling Cider Cocktail

Prep Time: 5 minutes
Total: 10
Serves: 8

Ingredients

2 cups chilled pear nectar
2 cups apple cider
2 cups ONEHOPE Sparkling Wine
4 ounces bourbon whiskey (I used Knob Creek)
1 pear, unpeeled and cored cut into thin slices lengthwise
2/3 cup sugar, 1/3 cup cinnamon mixed for rimming

Directions

Rim champagne coups with cinnamon and sugar mixture.
Combine pear nectar, apple cider, Sparkling wine and whiskey in a pitcher and serve immediately.
Garnish with sliced pear.

*Recipe adapted from here.

Design, Dine, Wine Tagged With: apple, cider, cocktail, family, friends, gratitude, home, love, pear, recipe, sparkling, thanks, thanksgiving, work

Photo Shoot Inspiration

November 18, 2013

30a43e3dd2f530af36554b26c72519ef

Image via

Oh hello!  Happy Monday!  I’ve been a little MIA and apologize there.  My best friend from high school got married over the weekend and her sister, who was the maid of honor, is very pregnant with twins and couldn’t travel last minute.  She asked me to step up to the plate and it was such a whirlwind of a weekend.  There were some stressful moments, but everything ended up perfectly and  I could not be happier for my friend and her amazing new husband.  They met during our first week of college and are truly a perfect match.  I’m such a sucker for love and seeing them so happy on their day made my heart burst with joy.  Eeeee!  Even thinking about it still brings tears to my eyes.  I’ll be sure to share more there as soon as we get some pictures 🙂

On the work front, this week is going to be a big one as we plan a holiday crafts + cocktails photo shoot.  I’m SO excited for it.  I’ve pretty much been using the above image for every ounce of inspiration for styling this thing… everything about it is perfection.  The rustic textured table, the simple rosemary place settings and green + gold + white/neutral is my FAVORITE color palette on the planet.  So many ideas flowing… Time to get to work!

Hope your week is off to a great start!

xoxo

Design, Life, Wine Tagged With: gold, green, love, monday, photgraphy, photo shoot, rustic, wedding, weekend

Office Inspiration

November 7, 2013

Color-PaletteAs much as I love the black executive suite at our office, the marketing team’s space on the top floor is collaborative, bright, airy, open and white… which is truly my go-to aesthetic.  It’s hard to believe that it’s been over a year since we moved into our space and within that year, we’ve inevitably had everything from boxes to paper samples to glass samples, ribbon – you name it – pile up… everywhere.  I took a day this week to de-clutter my personal work space and I was shocked at what an unbelievable weight was lifted off my shoulders.  I actually WANT to get to the office early, light a candle, put on some tunes and get creative.

Around the same time, I’ve been stalking admiring Emily Henderson’s latest project (isn’t she seriously THE BEST?!?!) and being that my color palette right now is basically mint/sea foam green, white and flax, I realized how insanely easy it would be to integrate some of the warmer blush tones and a hint of raspberry or coral to spruce things up.  I finally pulled the trigger and ordered some art that I’ve been wanting forever and can’t wait to pull everything together hopefully next week 🙂  Below is a little inspiration board I threw together… What do you think?

Office-Inpsiration

love print / made by girl
greek key pillow / caitlin wilson textiles
monique lhuillier / blush champagne coupe
french cade lavendar candle (favorite candle ever) / voluspa
do good print /sugar paper
faux sheepskin / ikea
hold the phone / fab
gold polka dot pillow / caitlin wilson textiles
peonies in a vase / minted

Design, Interiors Tagged With: art, black executive suite, blush, career, color palette, design, desk, Emily Henderson, grey, ign, inspiration, interior design, office, office space, pink, white, work

Weekend Project – Patio Garden

October 25, 2013

Last weekend, after returning home from New York, I was really adamant to finish something.  I’ve got a list of DIYs coming out of my ears, but really wanted to get one done, on the books and out-of-the-way.  Enter… our outdoor space.  When viewing our place for the first time, I was THRILLED when I stepped outside and my question of “oh, so this is a shared space?” was answered with “no, this would be all yours”.  Literally, you guys.  I was shaking with excitement.  I couldn’t get Jake on the phone fast enough.  I am obsessed with gardening (thanks to my mom for that gene) and I take no shame in enlisting friends to care for my little green kids as much as they do for Lily whenever I’m away.  Having a space that was so much bigger than ever before to create my own little garden by the beach?!  YES please.  Thankfully, after borderline stalking our now landlord, we got the apartment and I couldn’t wait to go to town.  We have a patio directly off of our bedroom as well as yard (glorified patio – not pictured) up some steps and behind our duplex.  Sold.  However, said patio was hideous when we moved in. HID.E.OUS.  Enter exhibit A:

IMG_0204

I told you.  Steps that needed to be stained, some RANDOM paint job going on there with a mixture of white and beige… But she had potential!  It was SPACE.  Real, live outdoor space of our very own that could be transformed into whatever we’d like.  The first thing on the list was to figure out what in the heck to do with the cinderblock walls.  Paint them?  Ideally, I wanted it to be a living wall to wake up next to (all Cameron Diaz like in The Holiday with electronic blinds that open with the sun shining in), but that seemed like a pretty lofty goal for a rental.  So, we needed to think of something else.  While running into Ikea one day for heavens knows what, I stumbled across the Applaro Outdoor Panel and knew I’d found a solution.  I figured out how many we’d need, bought them and since we got carried away with unpacking, traveling for work and life in general, there they sat until last weekend.  And then, finally came my little garden.

If you’re in a situation like us, here is what you need to create your OWN apartment garden with roughly $150.

Supplies

Ikea Applaro Outdoor Panel – Pot hooks included (3) $39
Ikea Socker pots (8) $0.79
Ikea white pots (2) $10.99 (no longer available online, but next size up here)
Masonry anchors + Bit $7
Total: $152.30

I already had most of the plants and the lanterns, as well as a drill and a level to make this all come to life, but factor in another $100 if you’re starting fresh.

Step 1: Hardware – I knew I was going to need a masonry bit as well as concrete anchors so I was able to find a package that included both the anchors and the right size bit to drill pilot holes for the anchors.  I bought some longer anchors too just in case the 1.25″ anchors were too short so that I wouldn’t have to run back out to the hardware store.

IMG_0208

Step 2: Place wall panels where you want them and make sure they’re level.  Since I was doing this by myself and since the panels were going to be resting on uneven brick pavers, this was honestly the hardest part.

IMG_0210

Step 3: Drill your pilot holes and screw in anchors to attach your panel.  This is pretty self-explanatory, but just make sure that you stop every once in a while to give your drill a rest.  I have a pretty inexpensive drill and while it’s amazing for the price, drilling through concrete/cinderblock is entirely different from wood or anything else I’ve ever done in the past.  And for the love of god, be CAREFUL when removing your bit.  It was SO hot from the friction and of course I wasn’t wearing gloves (idiot) and burned my fingers.  I’m fine, but that was no fun.

IMG_0213

Repeat until all panels are attached!  YAY!  Minus all of the crap to the left, the space is already starting to look so much better!  Now, time for the pots.  I decided to use the Socker pots from Ikea because a) they’re inexpensive b) they’re cute and c) they’re the perfect size for herbs and that is what was going in them.  However, they don’t have holes in the bottom for drainage or for hanging them on the hooks so you have to drill those manually.  Just make sure you use a bit suitable for metal.

IMG_0215

Step 4: Put your little plants in the pots and hang on your wall!  You’re almost done!

IMG_0217

Step 5: Dress up the weird empty bottom area without rungs with plants, lanterns, candles, pumpkins if it’s October… get creative!  Or, if you have the space, Ikea sells a storage bench that can attach to the wall panels.

IMG_0221

Tadaaaa!  I still need to re-pot the larger rosemary plant as well as the olive tree AND re-stain those darn steps, but I think she’s looking pretty cute for just a few hours of work.

And for good time’s sake… before and after!

Before After Garden

Design, Floral, Interiors Tagged With: apartment, DIY, garden, gardening, home, house, Ikea, life, living, outdoor space, tutorial

Words of Wisdom

October 23, 2013

anything-final

I’m a huge fan of Bri Emery over at DesignLoveFest and her “Dress Your Tech” series is my absolute favorite.  I LOVE this desktop put together by Lauren Essl and it’s available as a free download over on Bri’s blog.  Simply put, these words of wisdom came when I really needed it most.  More often than not, I’m running at 100 miles per hour (October has been a complete blur) and I find that I beat myself up over absolutely everything – not responding to an email fast enough, not working out enough, not getting to the office early enough…  I think it’s imperative to constantly strive to create the best version of yourself, but it’s also so important to remind yourself every once in a while that you are enough.  You can not do everything and all anyone expects of you is for you to do your best.  Whenever I find myself wallowing in self doubt and on a downward spiral of feeling like I’m not enough, it’s usually my wonderfully honest and direct boyfriend reaffirming what I’m already feeling.  He has a really keen sense of when I’m headed into one of these lows and is so amazing (although I don’t always appreciate it) at letting me know to take a moment for myself to clear my mind.  I’ve realized that what sends me to this point is usually an overall lack of writing down my goals and keeping lists of what I want and need to accomplish.  Trying to organize it all in my mind simply doesn’t work for me when things get hectic.  I’m looking forward to taking a step back with some time to reflect this weekend in Michigan.  The good ole’ midwest always knows how to put things in perspective for me 🙂

What do you do to help remind yourself to slow down?

Design, Life Tagged With: busy, calligraphy, design, graphic design, life, live, self esteem, tech, technology, typography, work

Fall Cocktail Shoot – Sneak Peek

October 21, 2013

IMG_9806

Eeeeee!  Our cocktail shoot from Friday went SO well and while we still have a few more looks to shoot today, I couldn’t help but share one of my favorites.  I have a well documented obsession with Carrara marble and recently picked up one of these French Pastry Slabs for my new place.  It serves as such a beautiful surface for styling and I knew we also needed one for shoots at the office.  I couldn’t possibly be more excited with how insane it makes the ingredients pop.  I’m so used to shooting directly on our huge farmhouse table, which is great when you’re going for really rustic, but I wanted to chic things up a bit and this made all the difference in the world.  Keep in mind, we haven’t edited a thing yet, so this is just a raw image.

Ok, ok and one more… 😉

IMG_9934

Happy Monday!

Design, Dine, Wine Tagged With: Carrara marble, cocktail, design, food styling, oranges, photography, styling, wine

High Low: Gilt Mirror

October 17, 2013

Gilt-Mirrors

While scanning the pages of Domino, I was FLOORED when I landed on the above vignette.  From the herringbone wood flooring, to the original fireplace and gorgeous ceiling detail – I could not take my eyes off of it.  The focal point of the room however, is the beautiful gilt mirror with its elegantly rounded corners and perfect patina.  It adds such an incredible richness to the space that plays off of the luxurious, gold tones in the floor and the brass lighting above the book shelves.

My boyfriend and I just moved into a new little apartment (more on that later) and I’m learning first hand what a tremendous impact adding mirrors can make.  It’s amazing how such a simple addition can draw your eye up, brighten up a space and make it appear so much larger than it actually is.  You almost don’t notice that the above room is pretty tiny, with room for just two chairs and a small table.  I also couldn’t help but note that I’ve been seeing this classic French mirror EVERYWHERE these days and being that the above version was $1,300 – now reduced to $1,088 (still yikes!), I sought out to find another alternative.  Enter the French Gilt Mirror from Wisteria at a whopping $700+ less.  Success!  Adding that to my wish list 😉

High-Low_Gilt-Mirror

Design, Interiors Tagged With: Architecture, design, gilt, gold, home, interior design, interiors

DOMINO

October 14, 2013

o_52278c4e9ac35fe0693b0bcd

Two weekends ago, I was standing in line at the Whole Foods in Austin, TX, when I saw the latest edition of Domino.  I assumed it was just one of their special editions where they recycle content from past issues (which I would have purchased regardless), but I literally screamed when I flipped open the cover and discovered that Domino was back – for real.   I was so psychotically anxiously excited that I had to pull myself together and figure out how to formulate a comprehendible sentence to explain to my co-worker that this was just the best thing to ever happen.  Seriously.  Ever.  Design publications come and go with a feature or two that are tear outs/keepers, but I have never thrown away an issue of Domino.  They never get old, never seem stuffy or outdated… just excellent, solid, classic design and delightfully inspirational – always.

In their first formal issue back, they visited the home of Manhattan restauranteur, Ali Cayne of Haven’s Kitchen, which I have been dying to see.  The goal behind Haven’s Kitchen is to create a food community of sorts where people can sign up for classes (without the need to enroll in full blown culinary school) cook together, learn and gain an understanding of the importance of locally grown and sustainable foods.  I’m so in love with their vision (you can learn more here) and their space is literally ONE BLOCK from where I’m staying in NY…… I think a visit is in order.  In the interim, take a moment to bask in all of the beauty of Ali’s insanely gorgeous West Village townhouse and check out the full line up and feature in Domino here.

o_52278c429ac35f50600b5864-2

{the most perfect floors – ever}

o_52278c4f9ac35fd26ace6f79

{effortlessly chic gallery wall}

o_52278c429ac35ff86be1af77

o_52278c449ac35f065d60706b-1

{jaw dropping}

o_52278c459ac35f2b7038bca6

o_52278c489ac35fd86bca064b

{subway tile, open shelving, brass fixtures, the creme de la creme range and hood… and a pot filler.  is there anything wrong with this kitchen?! no you’re right, there’s not}

o_52278c509ac35f2a671697bc

o_52278c499ac35f19675b02dd

{kthanks for letting me take a bath here forever}

o_52278c589ac35feb6db9b039

{two words: gilt mirrors}

Design, Interiors Tagged With: Architecture, design, domino, interior design, New york, nyc, west village

  • « Previous Page
  • 1
  • …
  • 3
  • 4
  • 5
  • 6
  • 7
  • …
  • 12
  • Next Page »
  • Facebook
  • Instagram
  • Pinterest

Search

About Meg

subscribe via email

Insta Love

Shop Pillows!

Recent

  • Late Summer Gazpacho
  • 2018 Harvest Party
  • Life Lately: Golden Hour
  • Sauvignon Blanc Harvest / 2017
  • Fig + Prosciutto Salad with Almond Milk Ricotta

Favorites

Follow Along!

  • Facebook
  • Instagram
  • Pinterest

© Copyright 2025. Design.Wine.Dine.. All Rights Reserved. Design by Bloom.