Design.Wine.Dine.

  • About
  • Design
    • Interiors
    • Events
    • Floral
  • Wine
    • Cocktails
  • Dine
    • Fall
  • Life
  • Travel
  • Contact
  • Facebook
  • Instagram
  • Pinterest

The Art of the Bar Cart

February 24, 2012

I’ve got a huge crush on bar carts at the moment.  When stocked full of colorful spirits, a stylish ice bucket and some gorgeous cocktail glasses, they simply add so much character to a space and a sense of effortless entertaining to a home (something I’ve vowed to get better at in 2012).  Additionally, they’re also a tremendous conversation piece: a place to display a set of heirloom glasses, that gifted bottle of Scotch from a special occasion, a jar of olives or bitters from a mom and pop shop during your latest travels, a gorgeous piece of art hanging above… the list goes on.  While we opted for more of a substantial wine bar/buffet when we moved into our place and have since run out of space for one of these beauties I’m completely re-inspired to spruce up our “bar tray” this weekend.

Bar Cart

{Lamp – ORANGE, Cart – Arteriors Home, Champagne Coupes – Kate Spade, Book – Cocktails by Amy Saaco, Wine – ONEHOPE Spakling, Coasters – Jonathan Adler}

Inspiration Images
-Original sources and more here–

Design, Dine, Interiors, Wine Tagged With: bar, bar cart, interior design

Winter Wedding Weekend in Telluride

February 23, 2012

I often have a hard time readjusting after taking a weekend break from this crazy city and our return from Telluride, CO where we witnessed our friends Phillip and Claire marry last weekend was no different.  The couple currently lives in London where Claire is an accomplished interior designer and Phillip is an attorney at a world-renowned firm.  Telluride is a very special place for both of them and I’m so happy to have experienced it for the first time.  Growing up enduring frigid Midwest winters, I could hardly imagine why anyone would ever vacation in a cold place.  After living in Southern California for a few years, however, I can completely understand and traveling to this tiny, snow-covered mountain town of 2,000 was nothing short of enchanting.  Here are a few of my favorite moments from last weekend that make me smile 🙂

{Stunning morning view from our condo}

{Downtown Telluride}

{Taking the gondola up for the first time}

{Gorgeous mountain views in every direction}

{ Rare blog picture of the boyfriend and I… thinking of this day makes me so happy 🙂 }

{The long descent back to Telluride}

{Exploring in the powdery snow}

{LOVED the cozy lodge feel and architecture}

{Refueling at 9545 in Mountain Village thanks to the suggestion of some friendly locals}

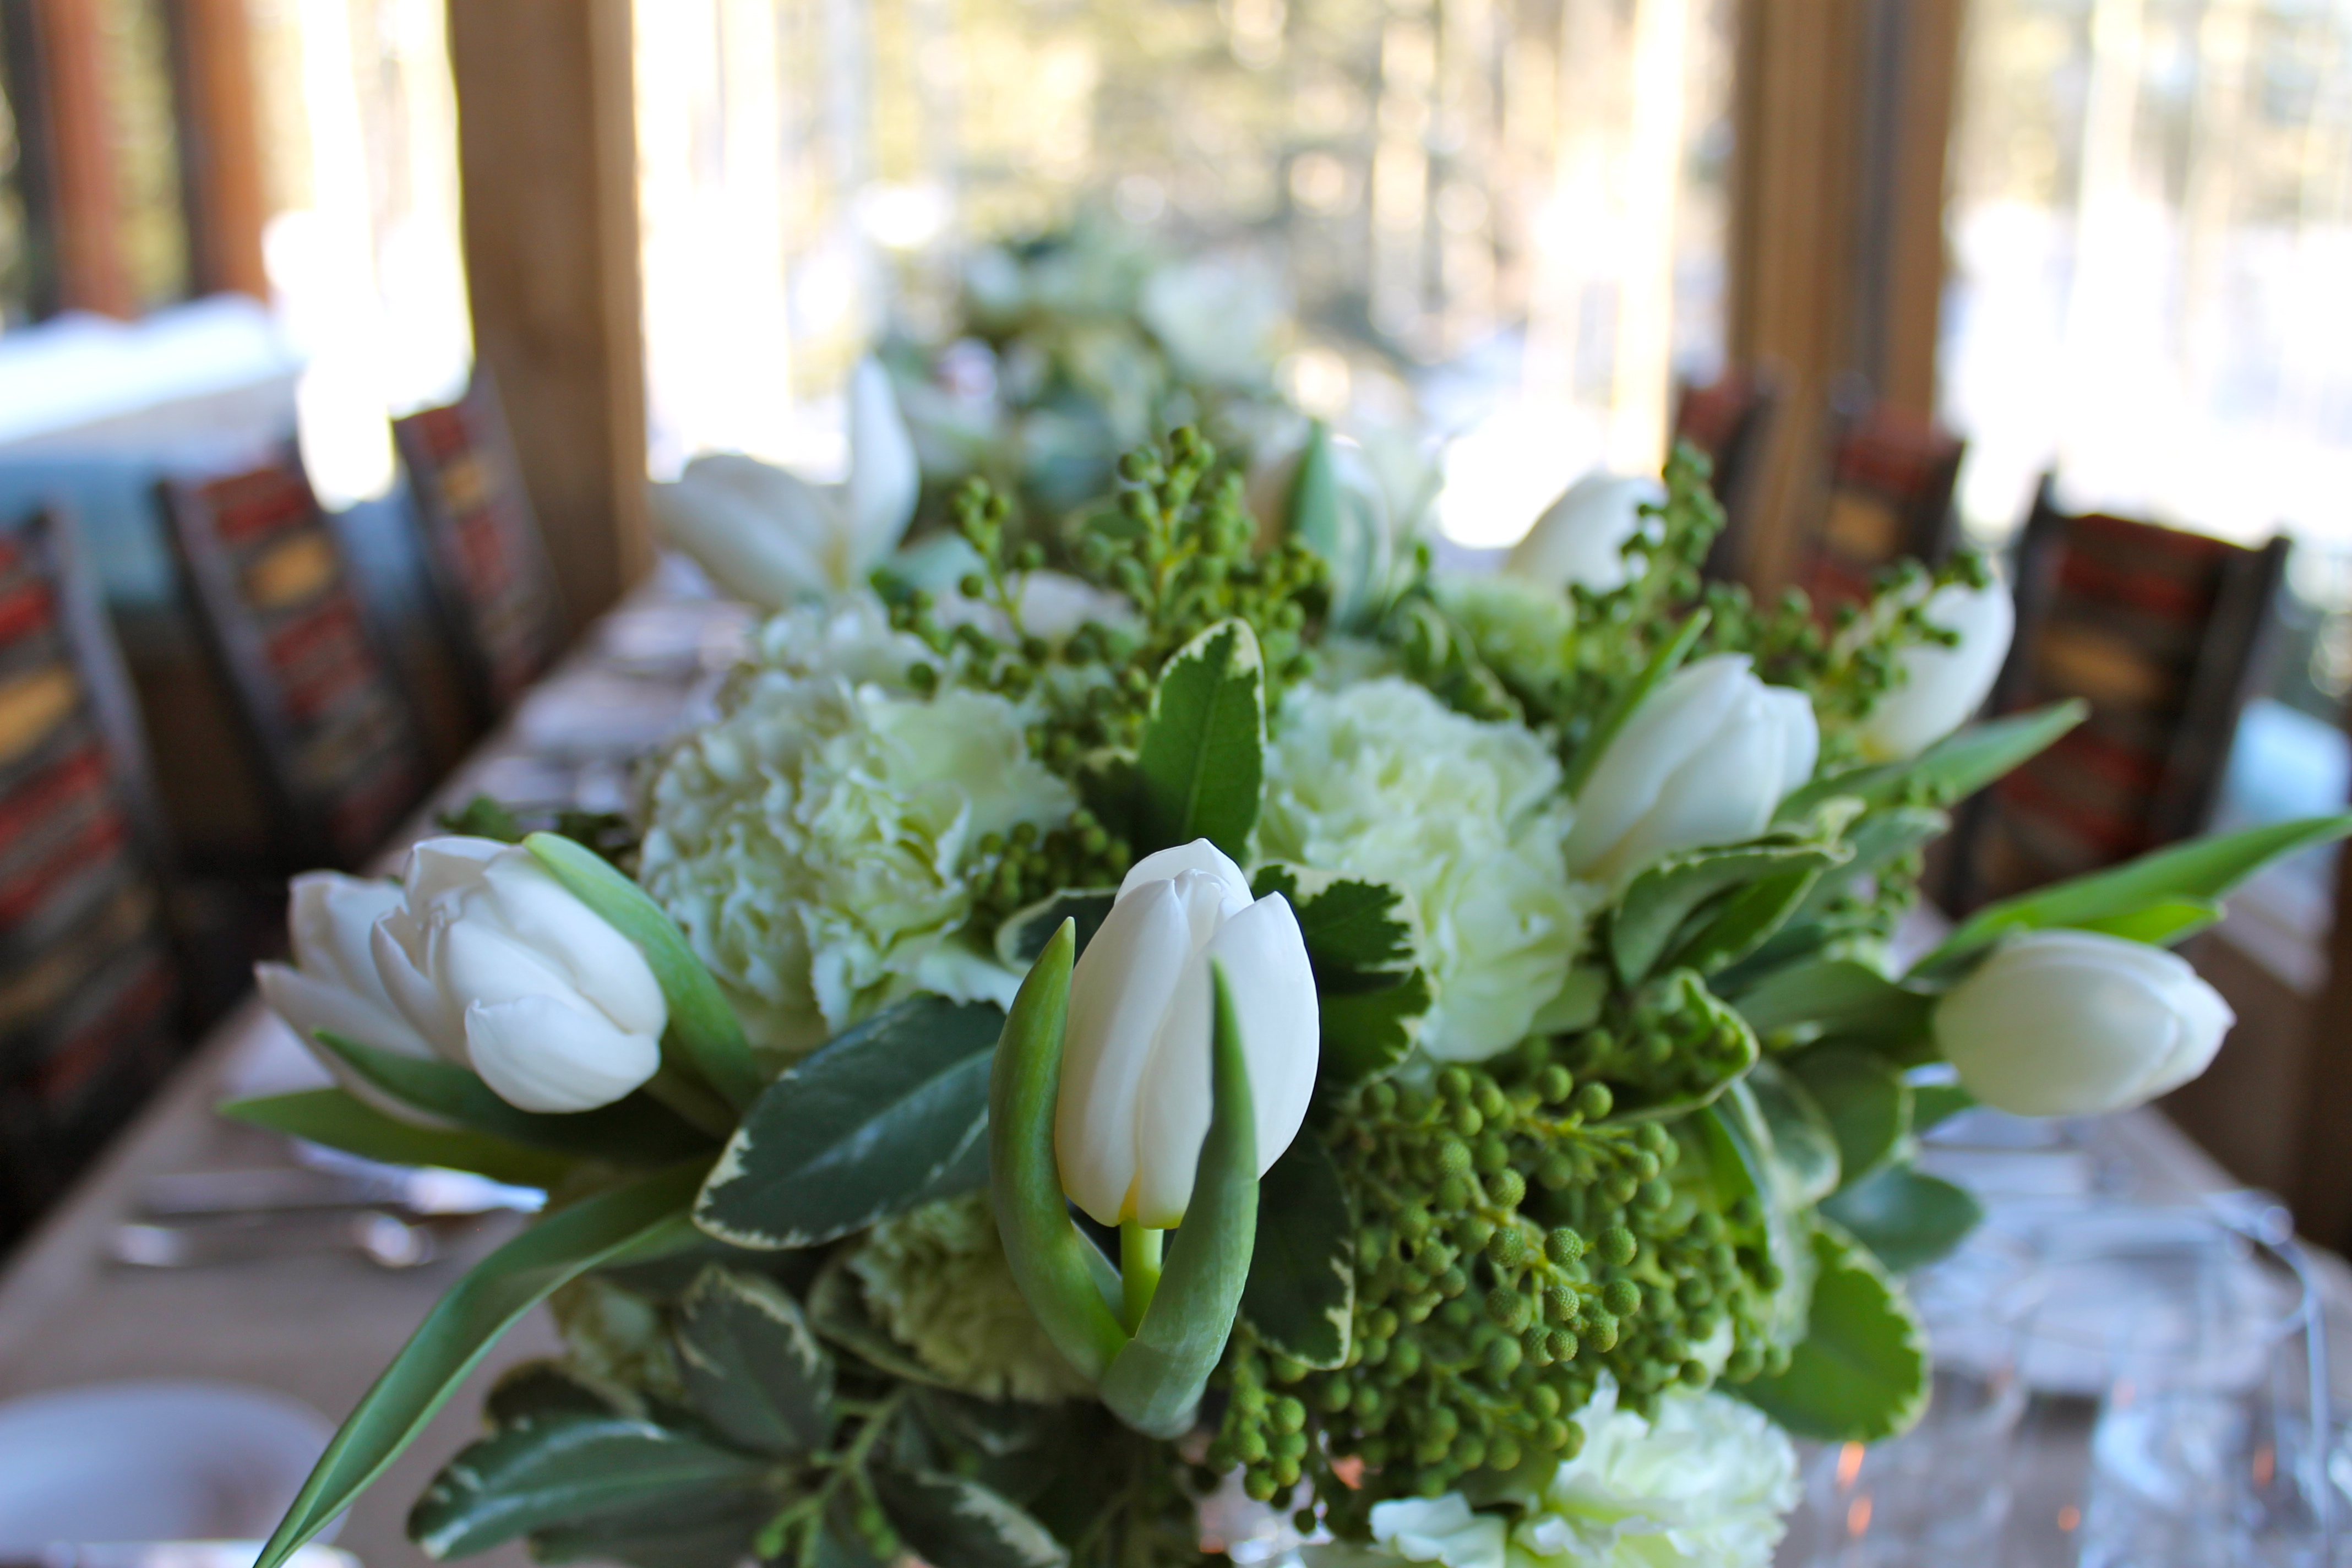
{Gorgeous flowers in the reception bar area}

{“Mr. & Mrs.”}

{White and green florals and mercury glass… stunning!}

{Beautiful tablescapes}

{Burlap tablecloths, white china, white florals, silver mercury glass accents… a gorgeous winter wonderland}

{Is there anything in the world better than lobster pastry puffs?!  I mean… come on!}

{Love}

{View from Allred’s at the top of the mountain}

{I’m a sucker for antler chandeliers}

{Delicious post wedding breakfast hangover cure at The Butcher & The Baker}

 {Southwest scramble}

{Gearing up for the looong drive home}

{Perfect AZ desert sunset to end our weekend}

Design, Dine, Floral, Interiors, Life, Travel Tagged With: colorado, design, fashion, flowers, food, snow, Telluride, travel, wedding

Greetings from Telluride!

February 17, 2012

After one hell of a drive from LA (it took us almost 24 hours to get here due to I-40 East being closed for a solid 14 hours), we FINALLY made it to Telluride late last night. We weren’t welcomed by this mountain town’s full beauty until this morning after sunrise when the gigantic shadowy outlines of hills turned into glistening, powdery white, breathtakingly gorgeous mountainscapes.  We’re here for our friend’s wedding tomorrow night at the Nugget Theater and then reception up the mountain (so romantic, I can hardly contain it!), so I’ll certainly have more pictures to share next week, but I couldn’t wait any longer to give you a sneak peek 🙂

Have a wonderful weekend, everyone!

Design, Life, Travel Tagged With: design, mountainscapes, nugget, sneak peek, snow, Telluride

Flower Arranging Tutorial

February 15, 2012

After taking a bit of a flower hiatus over the holidays, I was really itching to get back to the Flower Mart and get my hands back to work.  My friend’s February birthday was the perfect excuse so I drove downtown early one morning last week as the sun rose and with my tea in-tow to pick up a bundle of blooms and got to work.  After posting about Katie and Chris last week, I received a few emails asking how I do it – How flattering!  Quite simply, the answer is two fold.  I was raised by the most amazing mother with a green thumb passed down from my Grandfather.  For as long as I can remember, her hands were outside and in the dirt every Saturday and Sunday tending to her garden and she would make the most amazing arrangements.  I learned so much from just watching her, but she’d always share little tricks and secrets with me.  Also, to be quite honest, flower arranging just comes really naturally to me and is really soothing.  I’m amazed at the beautiful things nature creates on its own and I’m overwhelmed with gratitude and joy (even in the stressful moments!) while working with flowers.  It might seem difficult, but thankfully, the steps from fresh-cut blooms to the reward of a gorgeous arrangement are fairly simple… and I’m going to share them in as much detail as possible today.

{From left to right: Succulents, Dusty Miller, Dahlias, Ellington/Korean Fir, Ranunculus, Wheat Grass, Thistle.  Not pictured above: White Hydrangeas}

1.  First and foremost, decide what flowers you’re going to use for your arrangement.  For this one in particular, I was arranging for a friend who likes white flowers so I decided to use white flowers as a base with a lot of textured greens.

2.  Make sure you have everything you’ll need:  Container (and liner if your container is permeable), Oasis Floral Foam (for wet arrangements), flower picks with attached wire, floral tape (if you’re using foam to anchor your arrangements, you’ll almost never need tape, but I always keep it handy), pruners, flowers in fresh water.

3.  Cut your foam to the desired size (a knife works for this so don’t get talked into purchasing a foam cutter).  Make sure the foam fits snuggly in the container as to prevent the arrangement from shifting.   Take the foam out and soak it in a bucket of water until it no longer floats.  To speed up the process, sometimes it helps if you poke a few holes through the middle.

4.  Start with your largest flower (I like to use hydrangeas for this type of arrangement) give them a clean cut on an angle and cut away any leaves.  Place the first stem into the foam at one of the corners.  You want the flower to hang partially over the edge of the container.  Fill in the remaining three corners with hydrangeas and put the fifth hydrangea in the center.  When you are finished, you should still be able to see the foam if you look closely.  Make sure they aren’t packed together too tightly to add your remaining flowers.

5.  Choose your next largest flower, in this case it was the white dahlias.  Place them through (not next to) the hydrangeas and into the foam.  Putting them through the hydrangeas spreads the hydrangea buds apart and makes the arrangement more even and consistent.  You don’t want them to get lost in the hydrangeas so allow them to stick out a tiny bit further.

6.  The next flower I used was the ranunculus.  Since ranunculus have really thin and flimsy stalks (unlike hydrangeas and dahlias) it’s close to impossible to stick them into foam without them breaking.  Cut your ranunculus, bunch two of them together with a bud or two and wrap the wire of the pick around them as far down as you can go.  Clip to the desired length and place them into your arrangement.  Put a few of these little bunches through the hydrangeas and a few next to them to start filling in any gaps.

7.  Now on to the greens!  I used Dusty Miller to start because I absolutely LOVE the soft texture and the silvery hue.  Using the floral picks again, bunch 2-3 leaves together and add them to your arrangement.  Scatter several of these bunches throughout.

8.  Repeat with the white thistle (using the flower picks) since they also have really delicate stems.

9.   The silvery pine cone/artichoke looking greenery I picked up from the Flower Mart was referred to by two different names at different vendors: Ellington and Korean Fir.  I’m still not 100% sure what this is technically called, but it was beautiful and had so much great texture.  I scattered a few about in this arrangement.

10.  Lastly, I added some wheat grass to give the arrangement a soft, feathery look.  Follow the same steps as the ranunculus with a floral pic and scatter them throughout the arrangement.  Don’t push your little bunches too far into the foam, but allow them to stick out a little higher than then rest of the flowers to enhance that texture.

11.  Fill in any remaining space with some leftover flowers and voila!  You’re done!

Things to remember when making this type of arrangement:

–  Start monochromatically and move from lightest to darkest.  I always start with the largest flower (or base flower – in this case it was the hydrangeas) and since these were white, I used all of my white flowers first before moving onto the colored flowers and greens.  This allows you to seamlessly move from light to dark without too much contrast.  In my personal opinion, there is nothing worse than a white arrangement with really dark purple or blue buds and nothing to bridge that transition.  Working from light to dark will allow for a great flow of colors and textures.

–  You don’t necessarily need to use everything you have.  In this case, I picked up a few succulents and willow branches, but once I started arranging, I realized that I really didn’t need them for this particular piece.  Don’t feel obligated to use every single stem you buy.  Do what looks best.

If you feel like you’d still like some more instruction (and are in the LA/OC area) I’m happy to offer a crash course on flower arranging… perhaps one weekend over a few glasses of wine?  😉  Reach out if you’d be interested in something like this.  

HAPPY FLOWERING!

Design, Floral Tagged With: design, fashion, floral, flowers, wedding

Valentine’s Day Cookies

February 13, 2012

For the last two or three years, I’ve had full intentions of sending out Valentines and each year, regrettably, the holiday creeps up too quickly and I simply run out of time.  This year I was determined to get it done and pretty pink frosted sugar cookies seemed too enticing to pass up.  My mom and I made sugar cookies for Christmas and Valentine’s Day or Easter almost every year growing up and since I’ve been feeling a little homesick lately, I decided that using her recipe would be just the tasty pick-me-up I’ve needed.  They turned out just as good as I remembered so I thought I’d share the love <3

Ingredients

4 cups flour
1 ¼ teaspoon baking powder
1 teaspoon baking soda
¾ teaspoon salt
¾ teaspoon nutmeg
1 cup butter
1 ½ cup sugar
2 teaspoons vanilla extract
2 eggs
¾ cup sour cream

Directions

Mix flour with the next four ingredients
In a separate mixing bowl, cream butter until smooth
Add sugar to butter, creaming well
Stir in vanilla
Beat in eggs until fluffy
Add flour mixture, alternating with sour cream in 2-3 parts
Mix until dough is consistent
Cover and chill for at least an hour (but I chilled overnight)
Preheat oven to 450, roll dough ¼” thick and cut with desired cookie cutters
Bake on cookie sheet for 5-8 minutes
Wait for cookies to cool before frosting. I used the Royal Icing recipe on this Meringue Powder package.

Let your frosting set before placing them into your Valentine bags.  I used these bags with this baker’s twine and these ADORABLE Kraft Martha Stewart for Staples labels.

Pack and ship… I threw in a bottle of my favorite wine 😉  And of course, save a few for yourself!  Enjoy!

Design, Dine Tagged With: baking, cookies, cooking, pink, valentine, valentine's day

Katie + Chris

February 7, 2012

How gorgeous is this couple?!  I had the pleasure of doing Katie and Chris’s wedding flowers last fall after meeting her through our mutual friend Tiffany.  After anxiously awaiting the pictures from their big day (my camera was out of battery day of – worst luck ever!), Katie passed these on to me and I was too excited to wait for another Friday to come for a Friday Flowers post.

Now on to the love story!  The perfect pair met while she was Coxswain on the Long Beach State Crew Team and he was her coach – adorable!  The husband-and-wife-to-be were friends for about 4 years before their romance blossomed and now they both work for Los Alamitos schools – she is a speech language pathologist and he works for the auxiliary department.  For their Dana Point nuptials, Katie wanted to stick with a laid back, rustic, nautical, beachy feel (L-O-V-E) and wanted a fairly simple color palate of white blooms and yellow Billy Balls… one of my favorite combos.  Lucky for me, the bride was just as fun as her style and working with Katie and Chris was an absolute delight 🙂

Florals:
{Bride} O’Hara Roses, White Roses, Ranunculus, Dahlias, Gardenias, Billy Balls
{Boutonnieres} Billy Balls, Dahlia (for the groom)
{Bridesmaids} White Roses, Dahlias, China Mums, Spider Mums, Stock, Billy Balls
{Flower Girls & Flower Ceremony} Gerber Daisies
{Table Arrangements} Hydrangeas, China Mums, Spider Mums, Dahlias, Stock, Billy Balls

Venue: Ocean Institute – Dana Point, CA
Photographer: Mark Brook Photographers

Design, Floral Tagged With: California, fashion, floral, flowers, institute Dana Point, ocean, wedding

Tangerine Tango

January 9, 2012

My heart literally skipped a beat when I saw the 2012 Pantone Color of the Year.  I have been OBSESSED with Tangerine for almost my entire life, even before it was deemed the coolest color ever by the center of the color universe (mainly because it looks so fabulous on red heads… wink, wink).  Seriously though, how GREAT is Tangerine?!  So cheerful, so fun and full of life, so warm yet fabulously tropical at the same time.  Here are a few of my favorite tangerine hued items I just might have to make room for this year:

1.  Imperial Trellis by Kelly Wearstler – Schumacher
2. Striped Paper Straws – $4.50 – GreenMunch
3.  Saarinen Tulip Armchair – $1694 – DWR
4.  NARS Casablanca Satin Lipstick – $24 – NARS
5.  Compagnie de Provence Extra Pure Marseille Orange Blossom Hand Cream – $19.95 – Sur La Table
6.  Jamie Young Lamp Base & Shade – $250 – Layla Grace
7.  Swirl Tumbler Set – $24 – West Elm
8.  “Colors 51” Acrylic on Canvas by Jen Ramos – $95 – Coco And Hearts
9. “Totally Tangerine” Nail Polish by OPI – $4.99 – Amazon
10.  Bright Stockholm Letter Sorter – $9.99 – The Container Store
11.  Orange Versa Rug – Madeline Weinrib
12.  111 Navy Chair in Persimmon – $260 – DWR
13.  Butter Shine Lipstick in Ambrosia – $15 – Clinique
14.  Scarf – Hermes

Design, Interiors

J.Crew Christmas or Hanukkah or Whatever…

December 5, 2011

I’m OBSESSED with J.Crew, so if you’re like me, you’ll appreciate this sweet-as-a-sugarplum deal going on today only: 25% off and free shipping on ALL orders.  Just use the code HOLIDAY and get holiday shopping away!  Hint, hint, mom, boyfriend… 😉

LOVE it.
Favorite wardrobe staple.
Yes please.
Alright, alright a little much, but swoon!
Perfectly pretty and preppy.
Too much beauty to choose!

Stay tuned for some swell holiday gift guides… coming soon!  Xo

Design Tagged With: christmas, deals, fashion, hanukkah, jcrew, shopping

San Francisco Weekend

December 2, 2011

Last weekend, my boyfriend and I made the short trip up to the San Francisco bay area for Thanksgiving.  Since I go back to Michigan every year for Christmas, our Thanksgiving trip to northern California has become a little annual tradition that I completely adore.  This year we spent a ton of time in the city, which I didn’t mind one bit and while most of our time there was spent working on projects (rather than battling the Black Friday crowds), the view we had from our friend’s work studio was absolutely breathtaking.  Working is oh-so-much-better (and productive) with some gorgeous scenery to look out on.  While the pictures I took while there don’t even begin to do it justice, I can’t stop thinking about our weekend this morning and just had to share.

{Base of the Bay Bridge}

{View of the Bay Bridge from the Rincon Building}

{Alcatraz in the distance}

{An assortment of fresh cheeses, bread, grapes, tomatoes and meat from the Ferry Building – one of my favorite places in San Francisco}

{Dessert!  Fresh strawberries, cheese cake and a decadent chocolate cake.  Mmm!}

{Quick festive break at Gumps to view their gorgeous Christmas ornaments}

{Couldn’t get enough of the avocados.  How cute are these?}

{Bay Bridge at nighttime.  Stunning}

{Stunning view of the Golden Gate as I was flying in – a sight rarely seen flying into San Francisco because of the typical fog.  What a gorgeous day!  Take me back!}

Design, Travel Tagged With: san francisco, thanksgiving, travel

My Kind of Color

December 2, 2011

Confession: I’ve never once dyed my hair (unless you consider gold hair mascara in 8th grade “dyeing”) and up until a year ago, I absolutely despised painting my nails.  I’m convinced the combination of these two characteristics means I’m a pretty low maintenance girl.  “Haha,” says the boyfriend 😉  Truth be told, after a decade of having a ballet teacher tell you not to even think about a pedicure for fear of having your painfully earned point shoe calluses scraped off your feet, I didn’t even have a professional pedi until a few years back.  I know, I know… GROSS.  I don’t even want to know what my Thai manicurist might have been saying about my feet.  That being said, I’m kind of a late bloomer in the nail upkeep department and I’m terrible at picking out nail colors to suit my skin tone.  That all changed when I randomly and reluctantly toted home Mink Muffs by Essie on a CVS run last month.  The color is absolutely gorgeous on and I’ve since seen several LA ladies flawlessly sporting it around town.  I’m convinced it’s as close to a universal color as possible in the nail world and it looks just fabulous on everyone.

Essie Mink Muffs: Buy your own bottle here.

Design Tagged With: fashion, nail polish

  • « Previous Page
  • 1
  • …
  • 6
  • 7
  • 8
  • 9
  • 10
  • …
  • 12
  • Next Page »
  • Facebook
  • Instagram
  • Pinterest

Search

About Meg

subscribe via email

Insta Love

Shop Pillows!

Recent

  • Late Summer Gazpacho
  • 2018 Harvest Party
  • Life Lately: Golden Hour
  • Sauvignon Blanc Harvest / 2017
  • Fig + Prosciutto Salad with Almond Milk Ricotta

Favorites

Follow Along!

  • Facebook
  • Instagram
  • Pinterest

© Copyright 2025. Design.Wine.Dine.. All Rights Reserved. Design by Bloom.