Design.Wine.Dine.

  • About
  • Design
    • Interiors
    • Events
    • Floral
  • Wine
    • Cocktails
  • Dine
    • Fall
  • Life
  • Travel
  • Contact
  • Facebook
  • Instagram
  • Pinterest

Lately…

December 9, 2014

Screen Shot 2014-12-09 at 1.02.20 PM

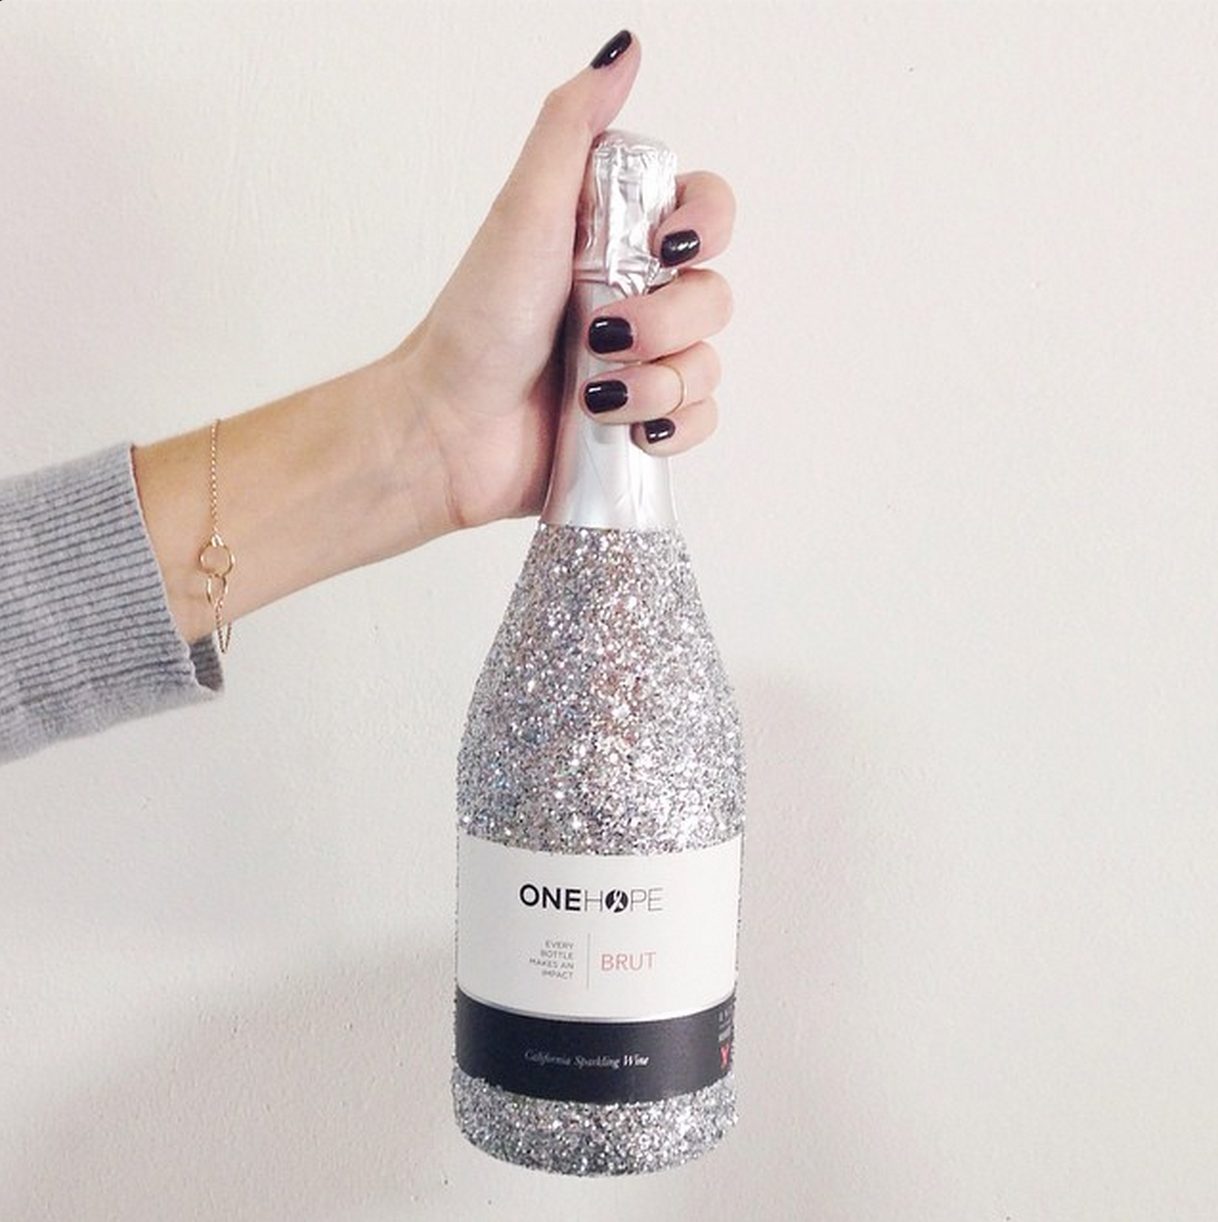
 {A shot of our famous glitter bottle.  How rad is this thing?!  AND each one provides 15 healthy meals to a child fighting hunger}

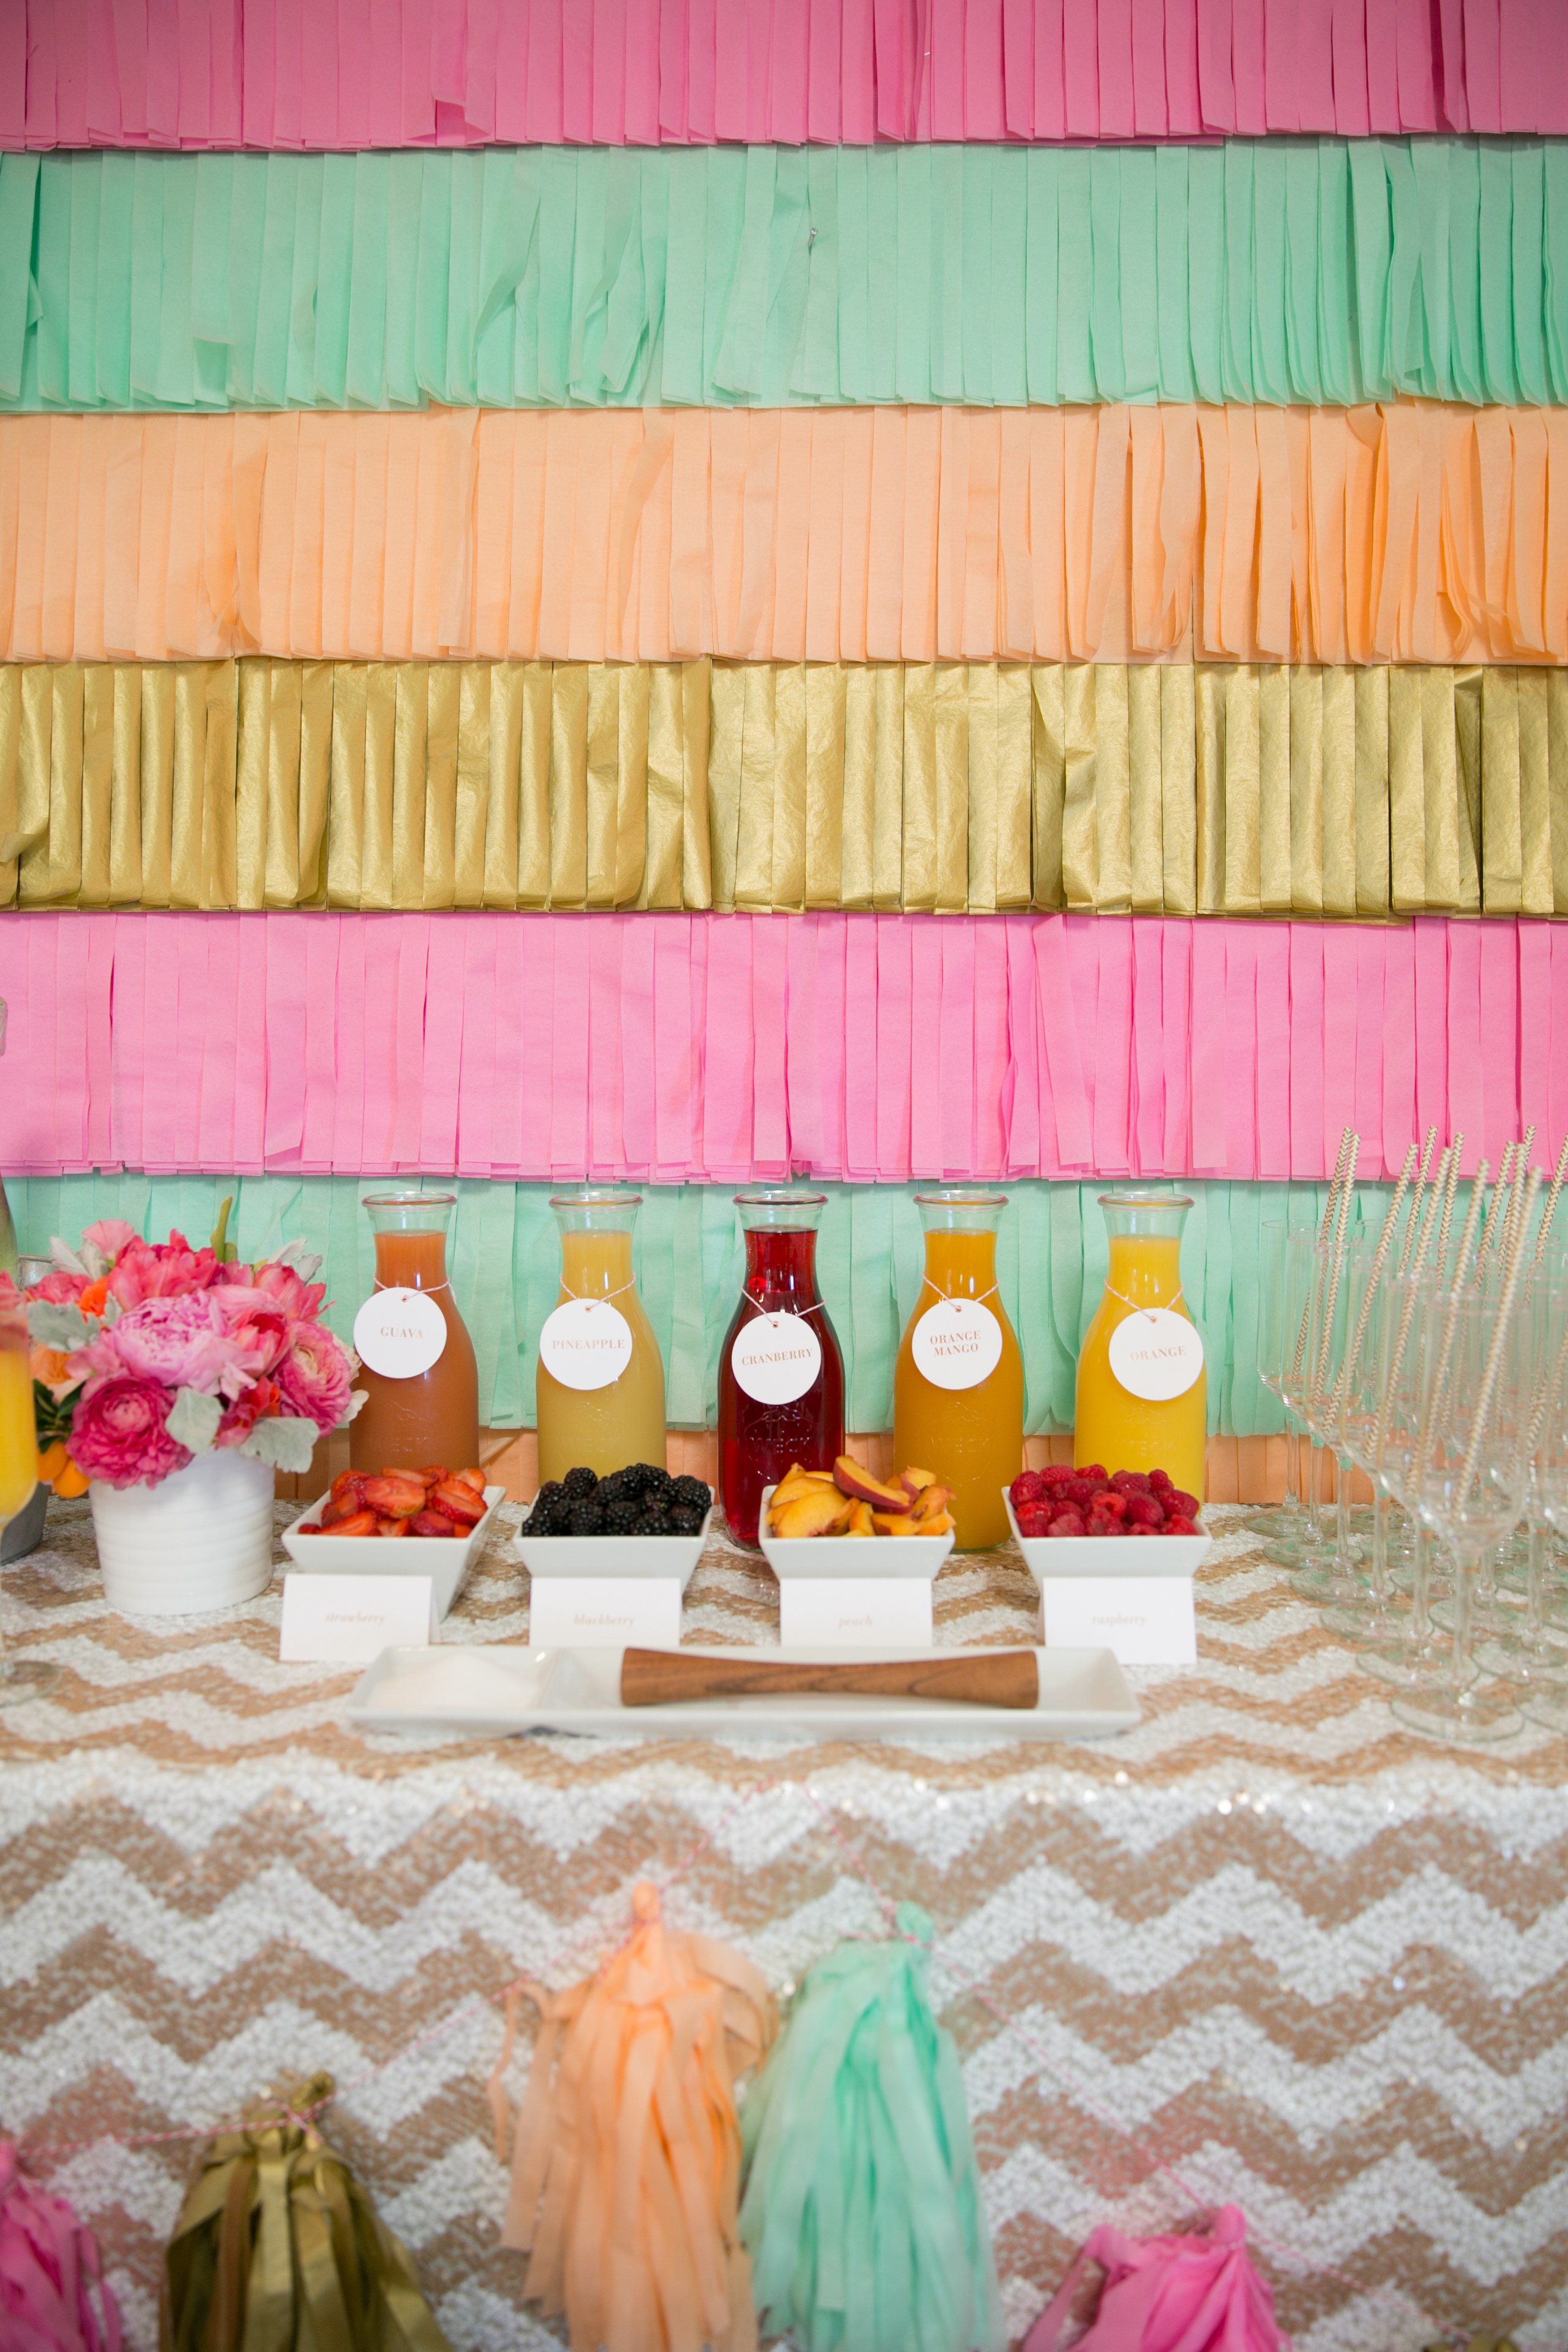
Hey there!  No matter how prepared we feel for the holidays at work, it’s always insane in December and blogging just falls by the wayside.  November and December are the two months when over 70% of our business for the YEAR occur and we trade our spaces behind the computer to high-tail it to the warehouse to help with fulfillment.  I realized it had been a few days since I last posted so I wanted to drop by with a note to say hello.  Check out a few of the things I’ve been working on and be sure to follow me on Instagram for more realtime updates 🙂

Screen Shot 2014-12-09 at 12.59.04 PM

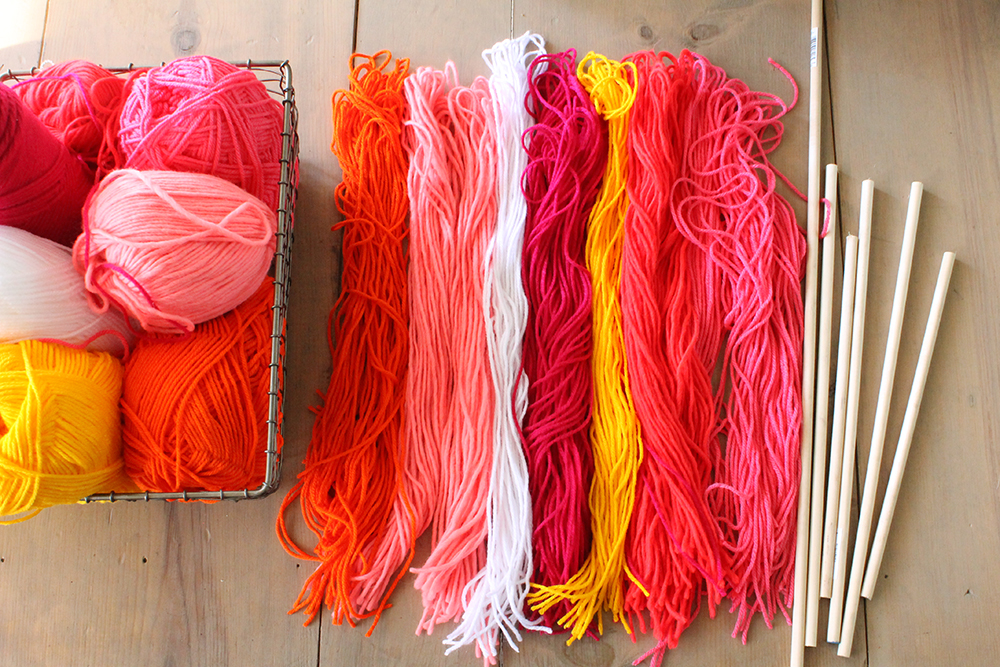
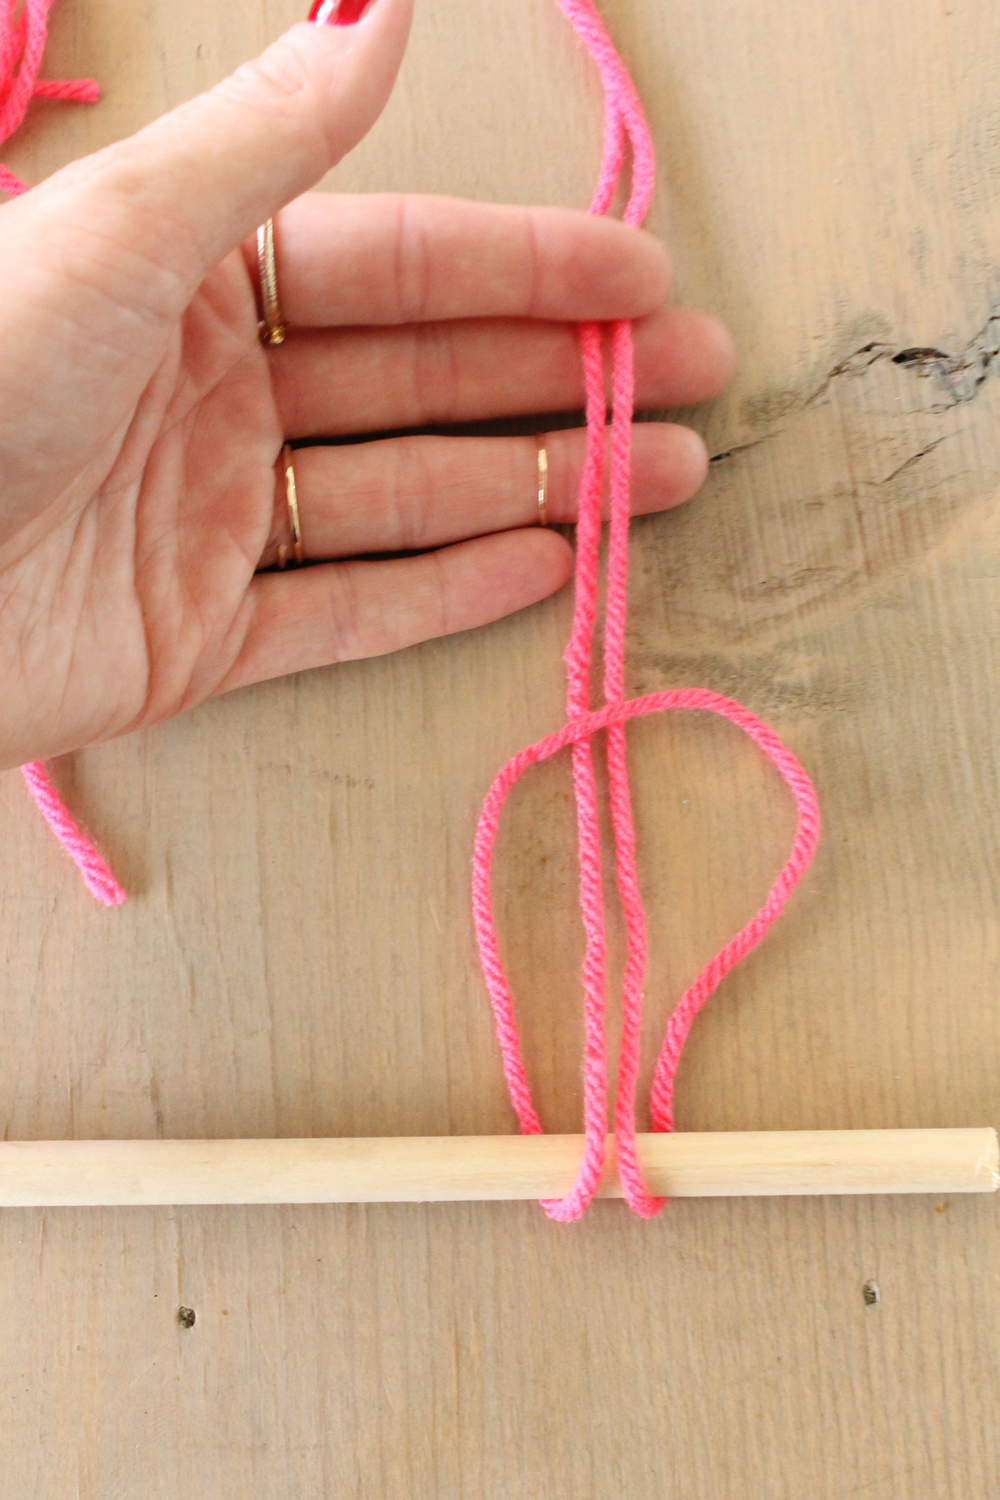
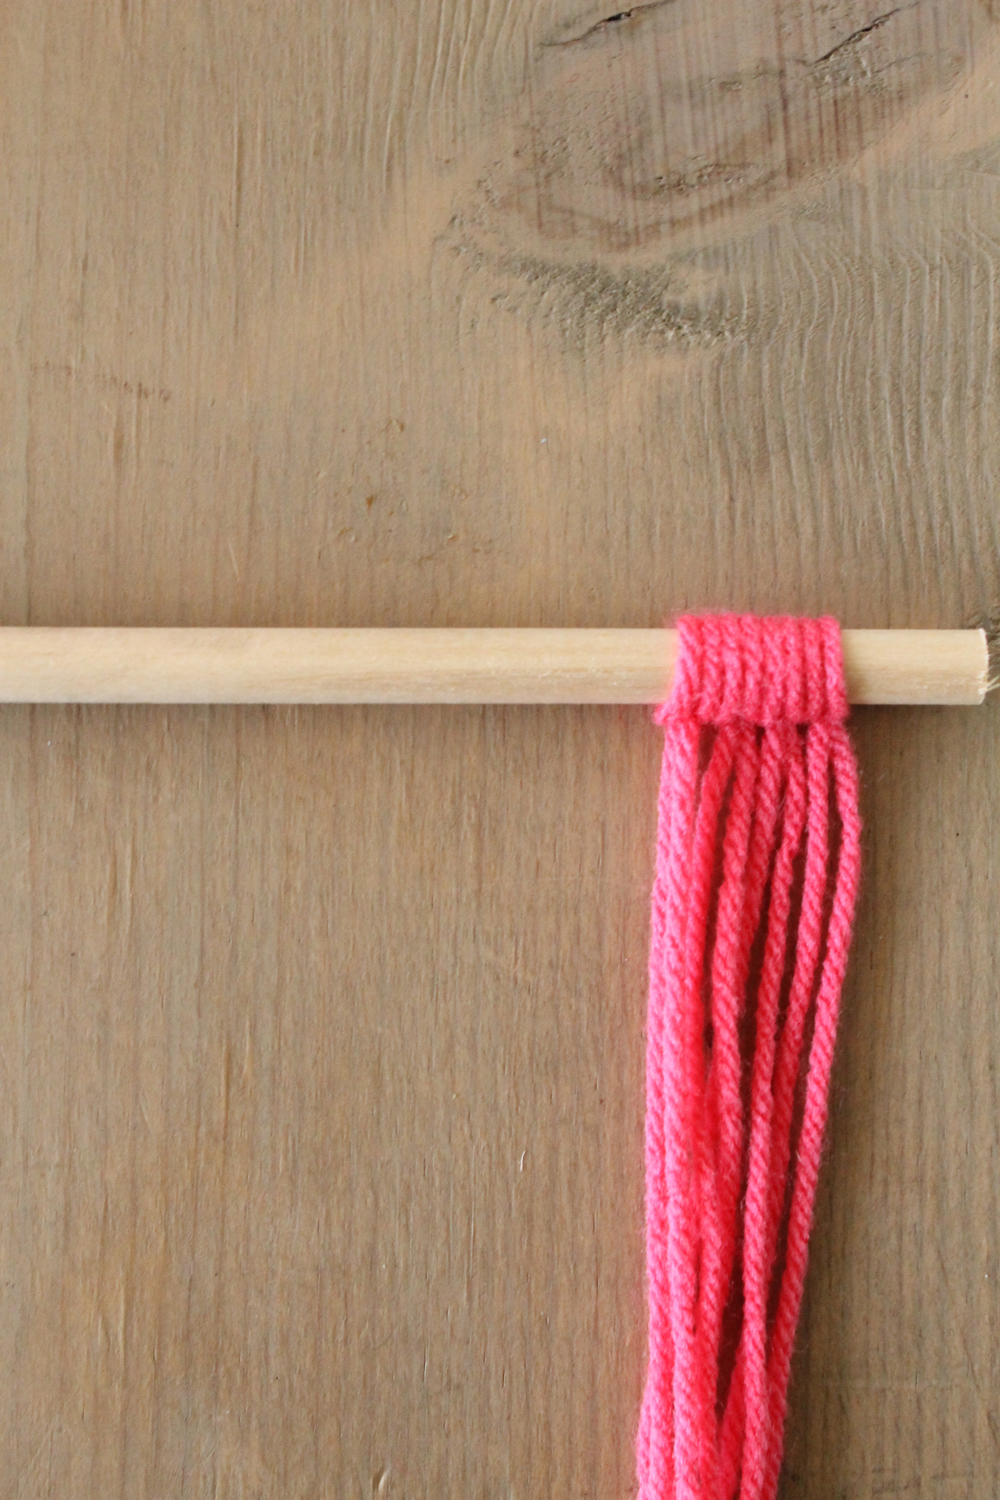
{Sneak peek at a fun new project I’ve been working on with my mom.  Pillows galore!  I’m dying over the colors!}

Screen Shot 2014-12-09 at 12.58.40 PM

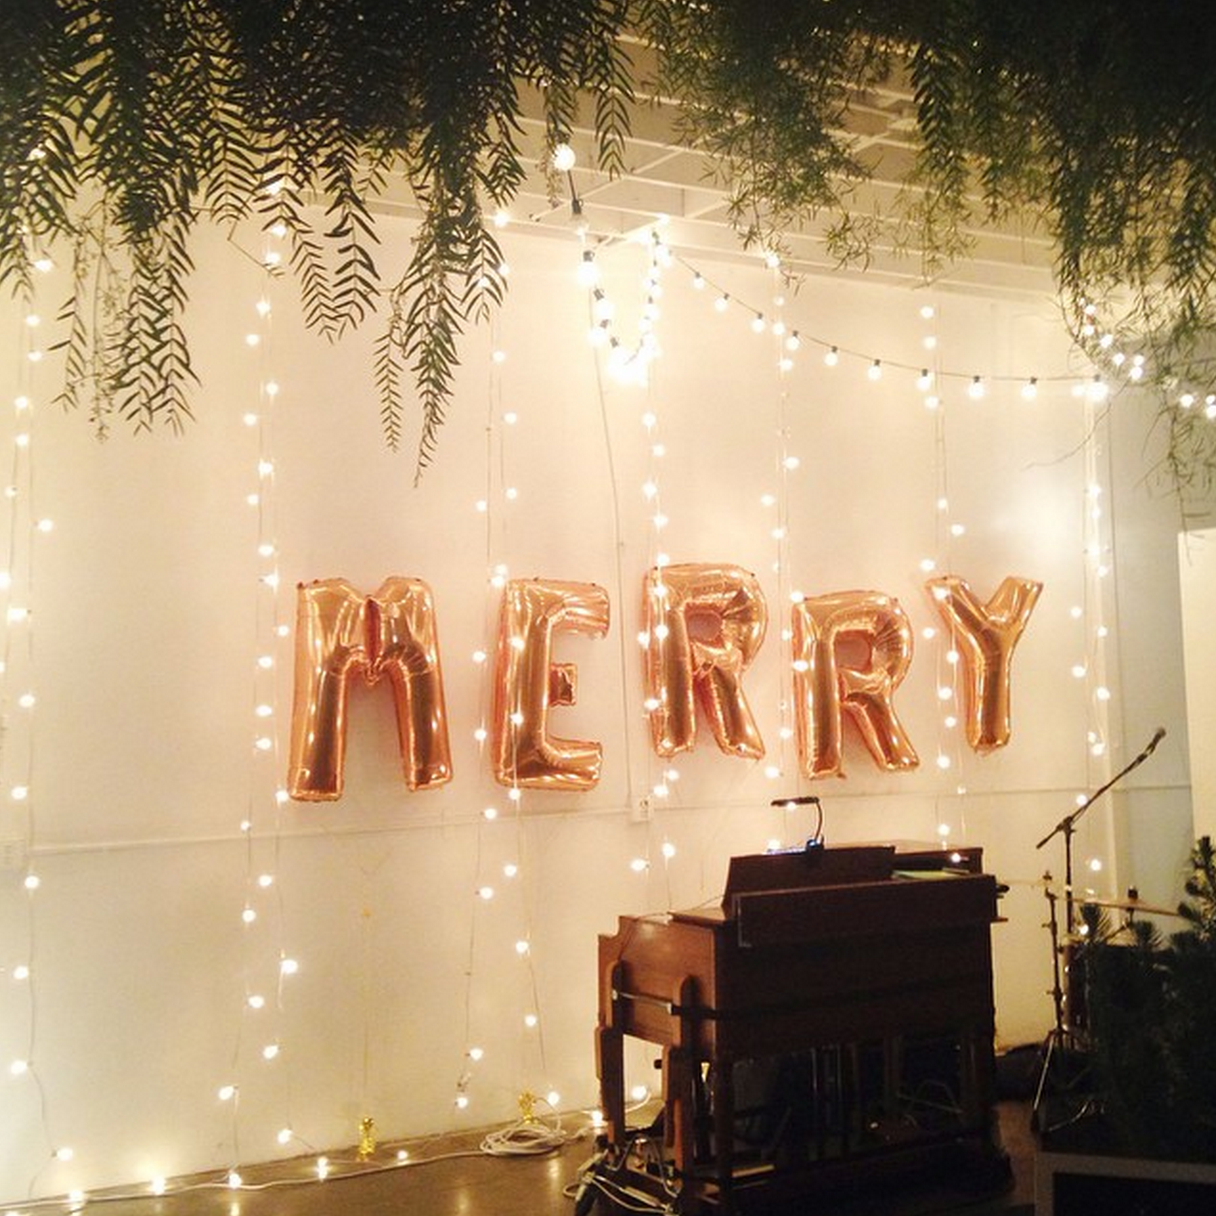
{The 31 Bits holiday party is always an absolute blast.  How dreamy is their space with those lights and balloons?}
Screen Shot 2014-12-09 at 12.58.20 PM

{Finally found a few hours to put up our tree 🙂 Half of the lights weren’t working, Target didn’t have any white lights in stock and the process took a million times longer than I expected, but her glow makes me SO happy.  And kitty is clearly enjoying it too.}Screen Shot 2014-12-09 at 12.57.59 PM

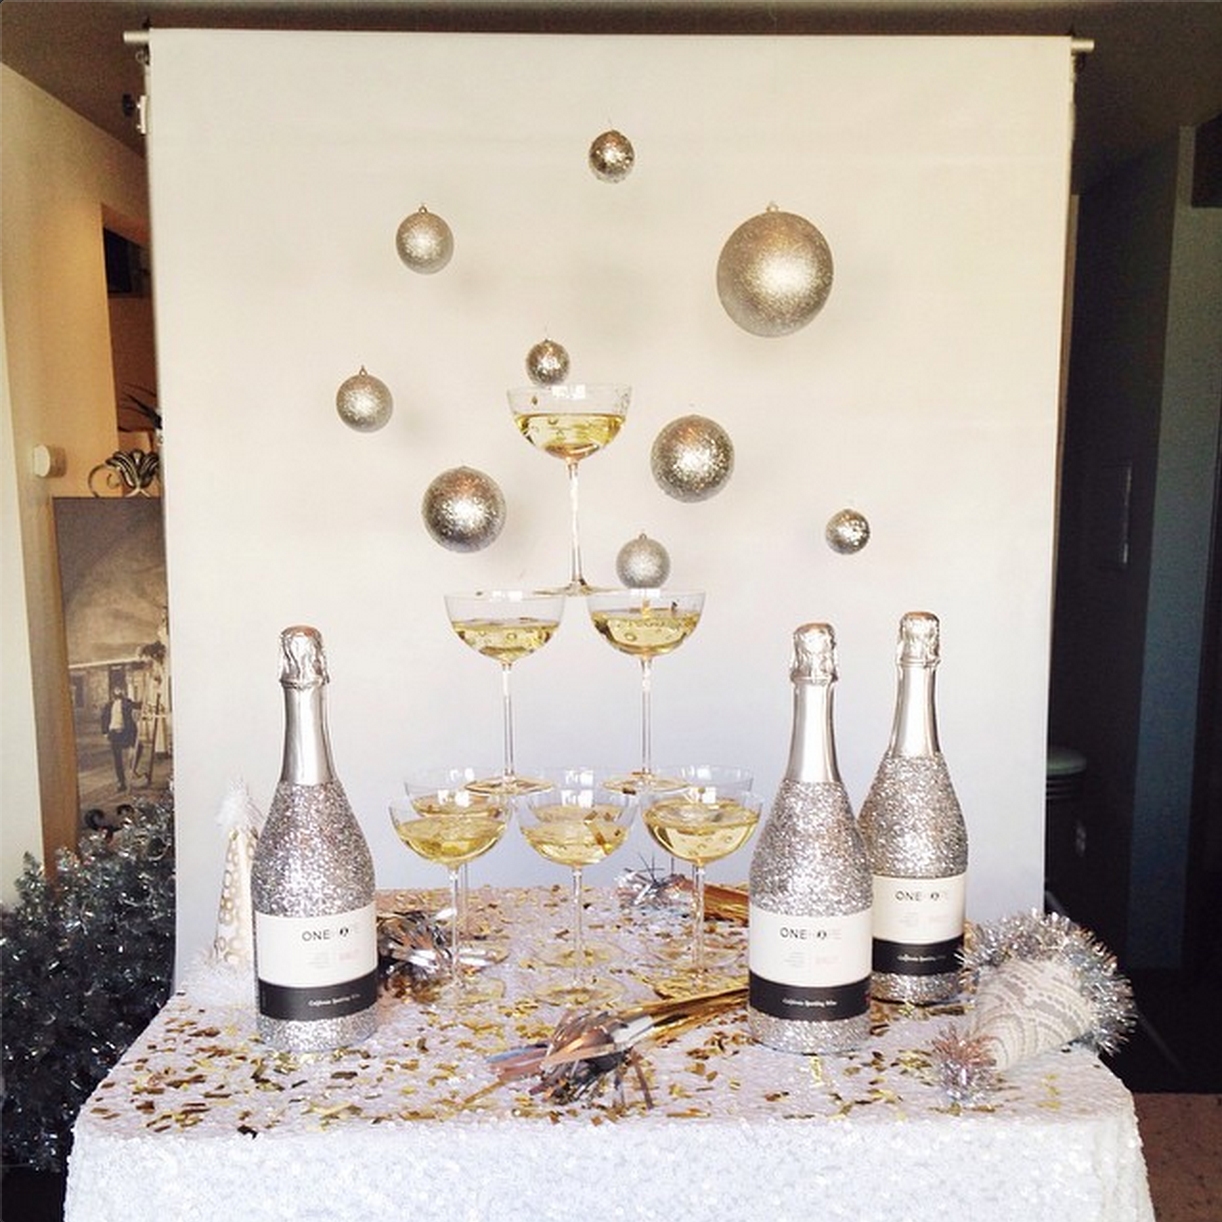
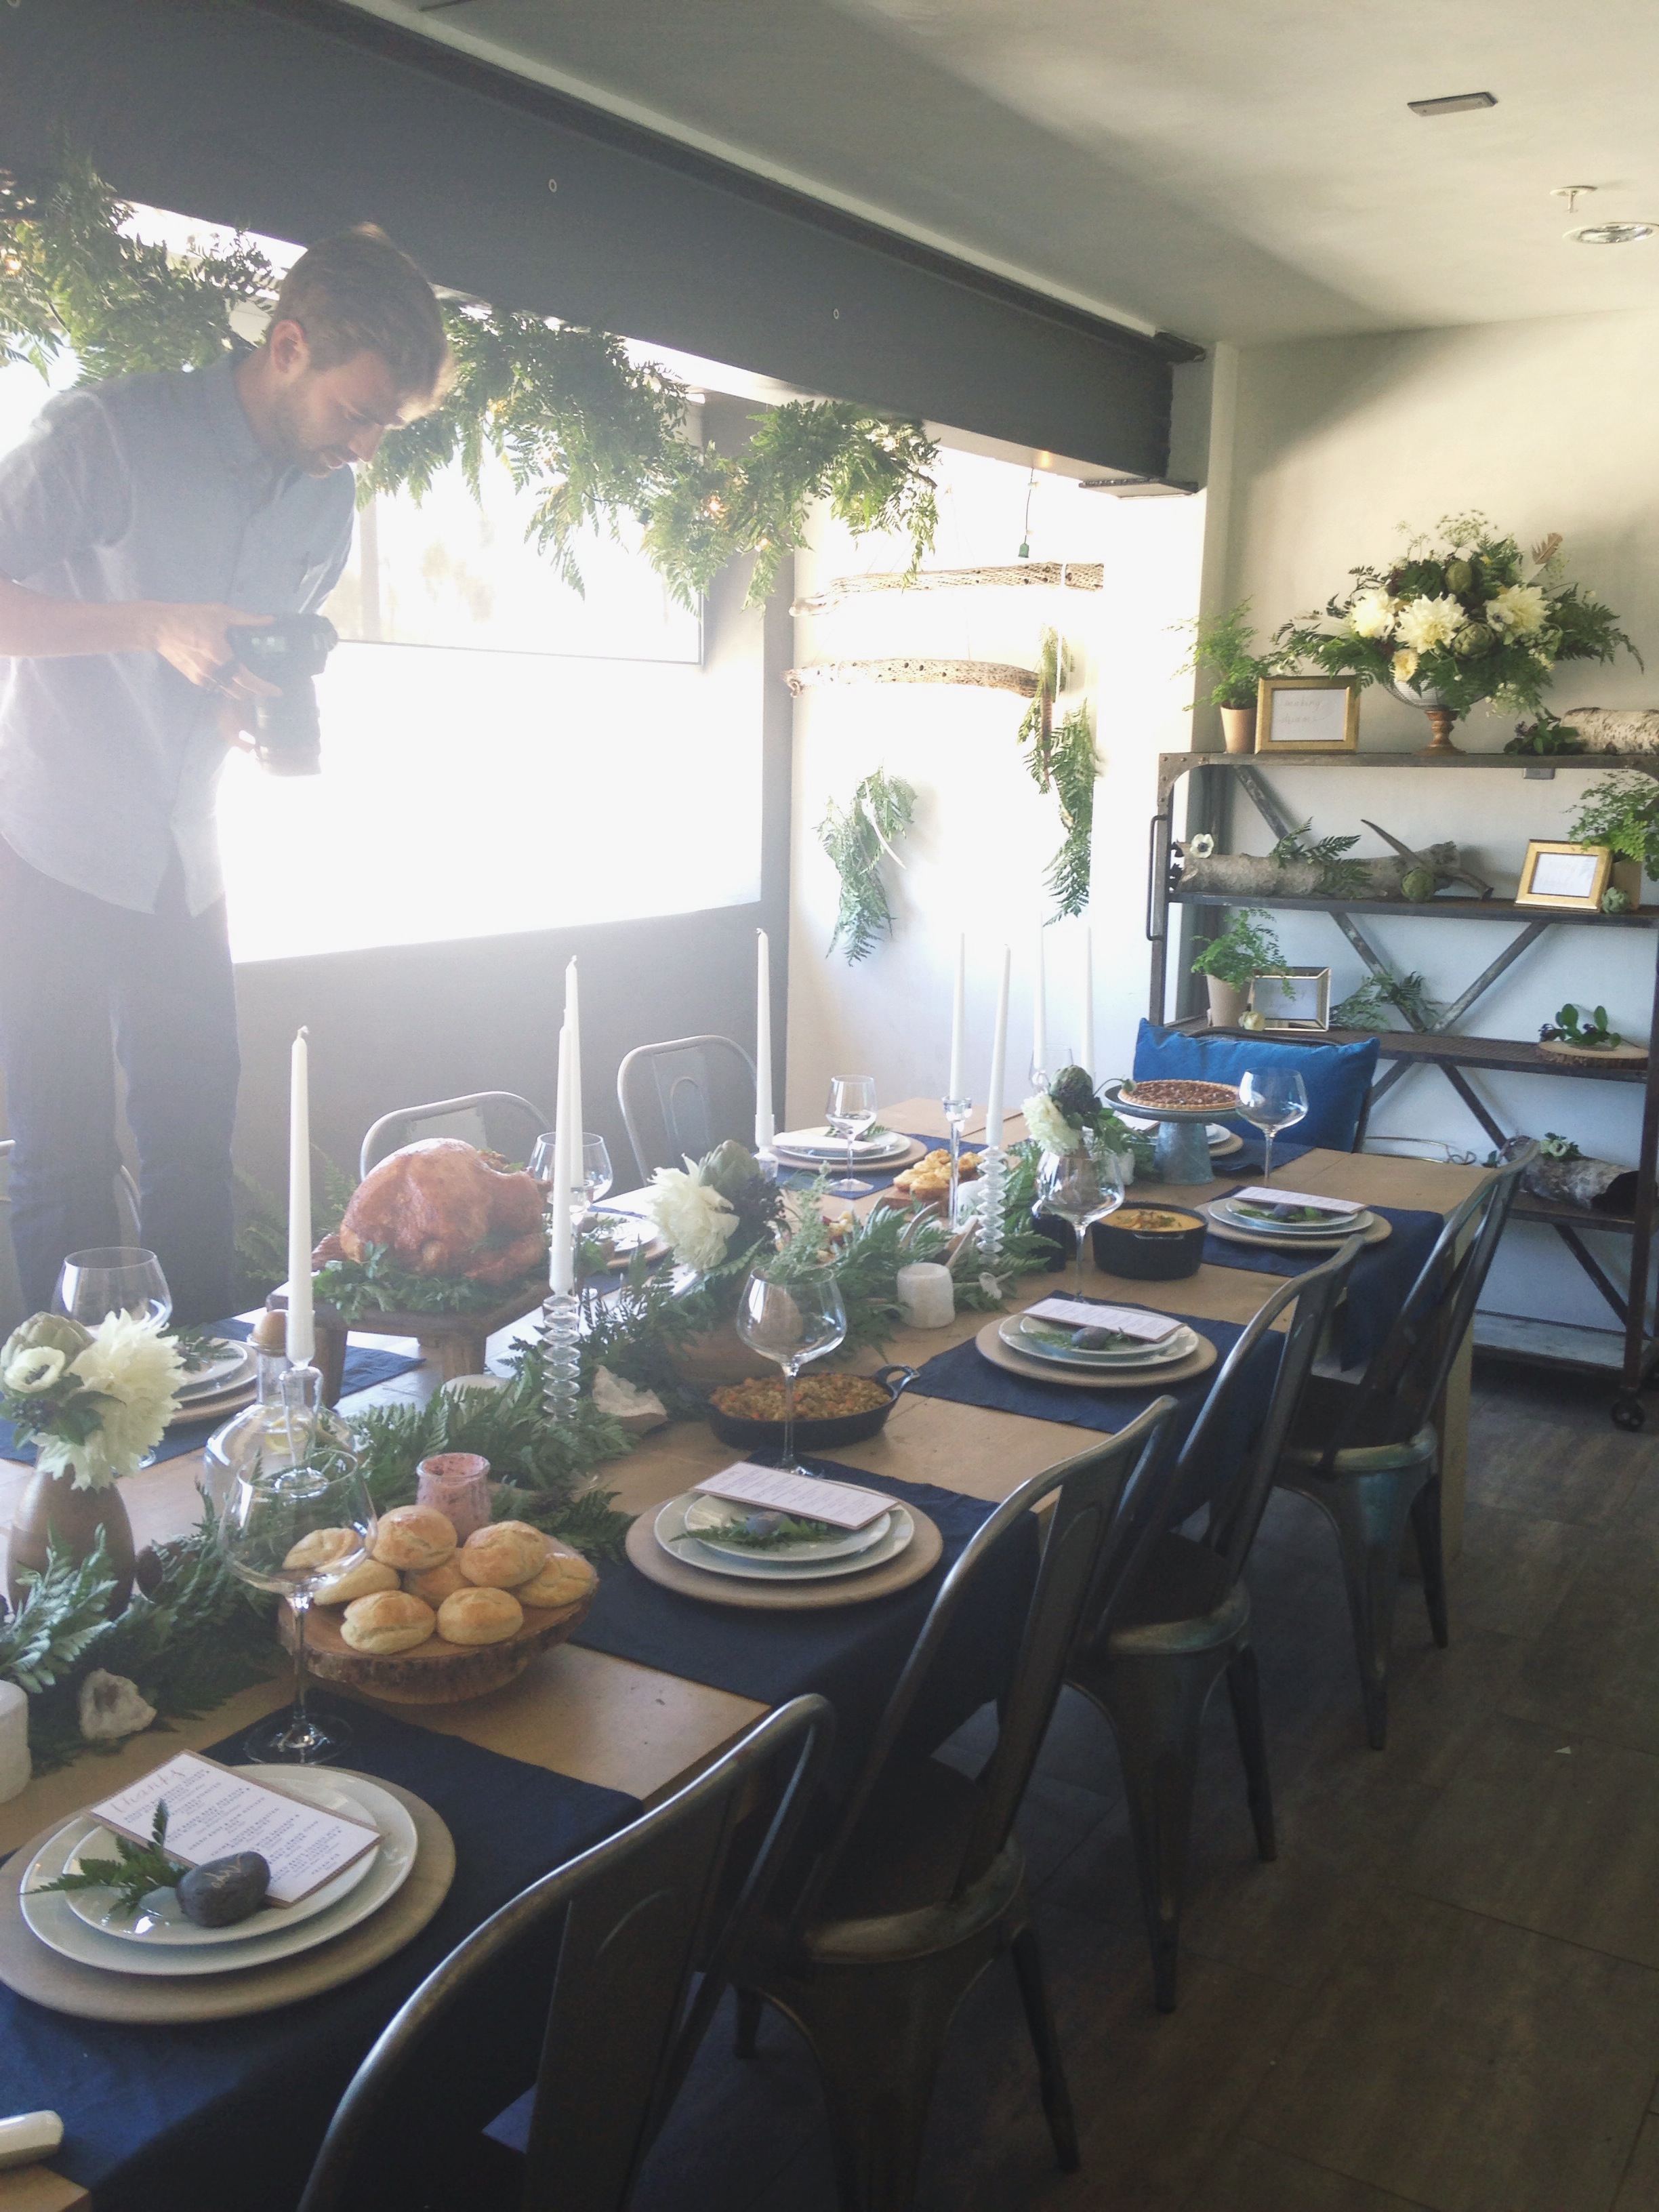
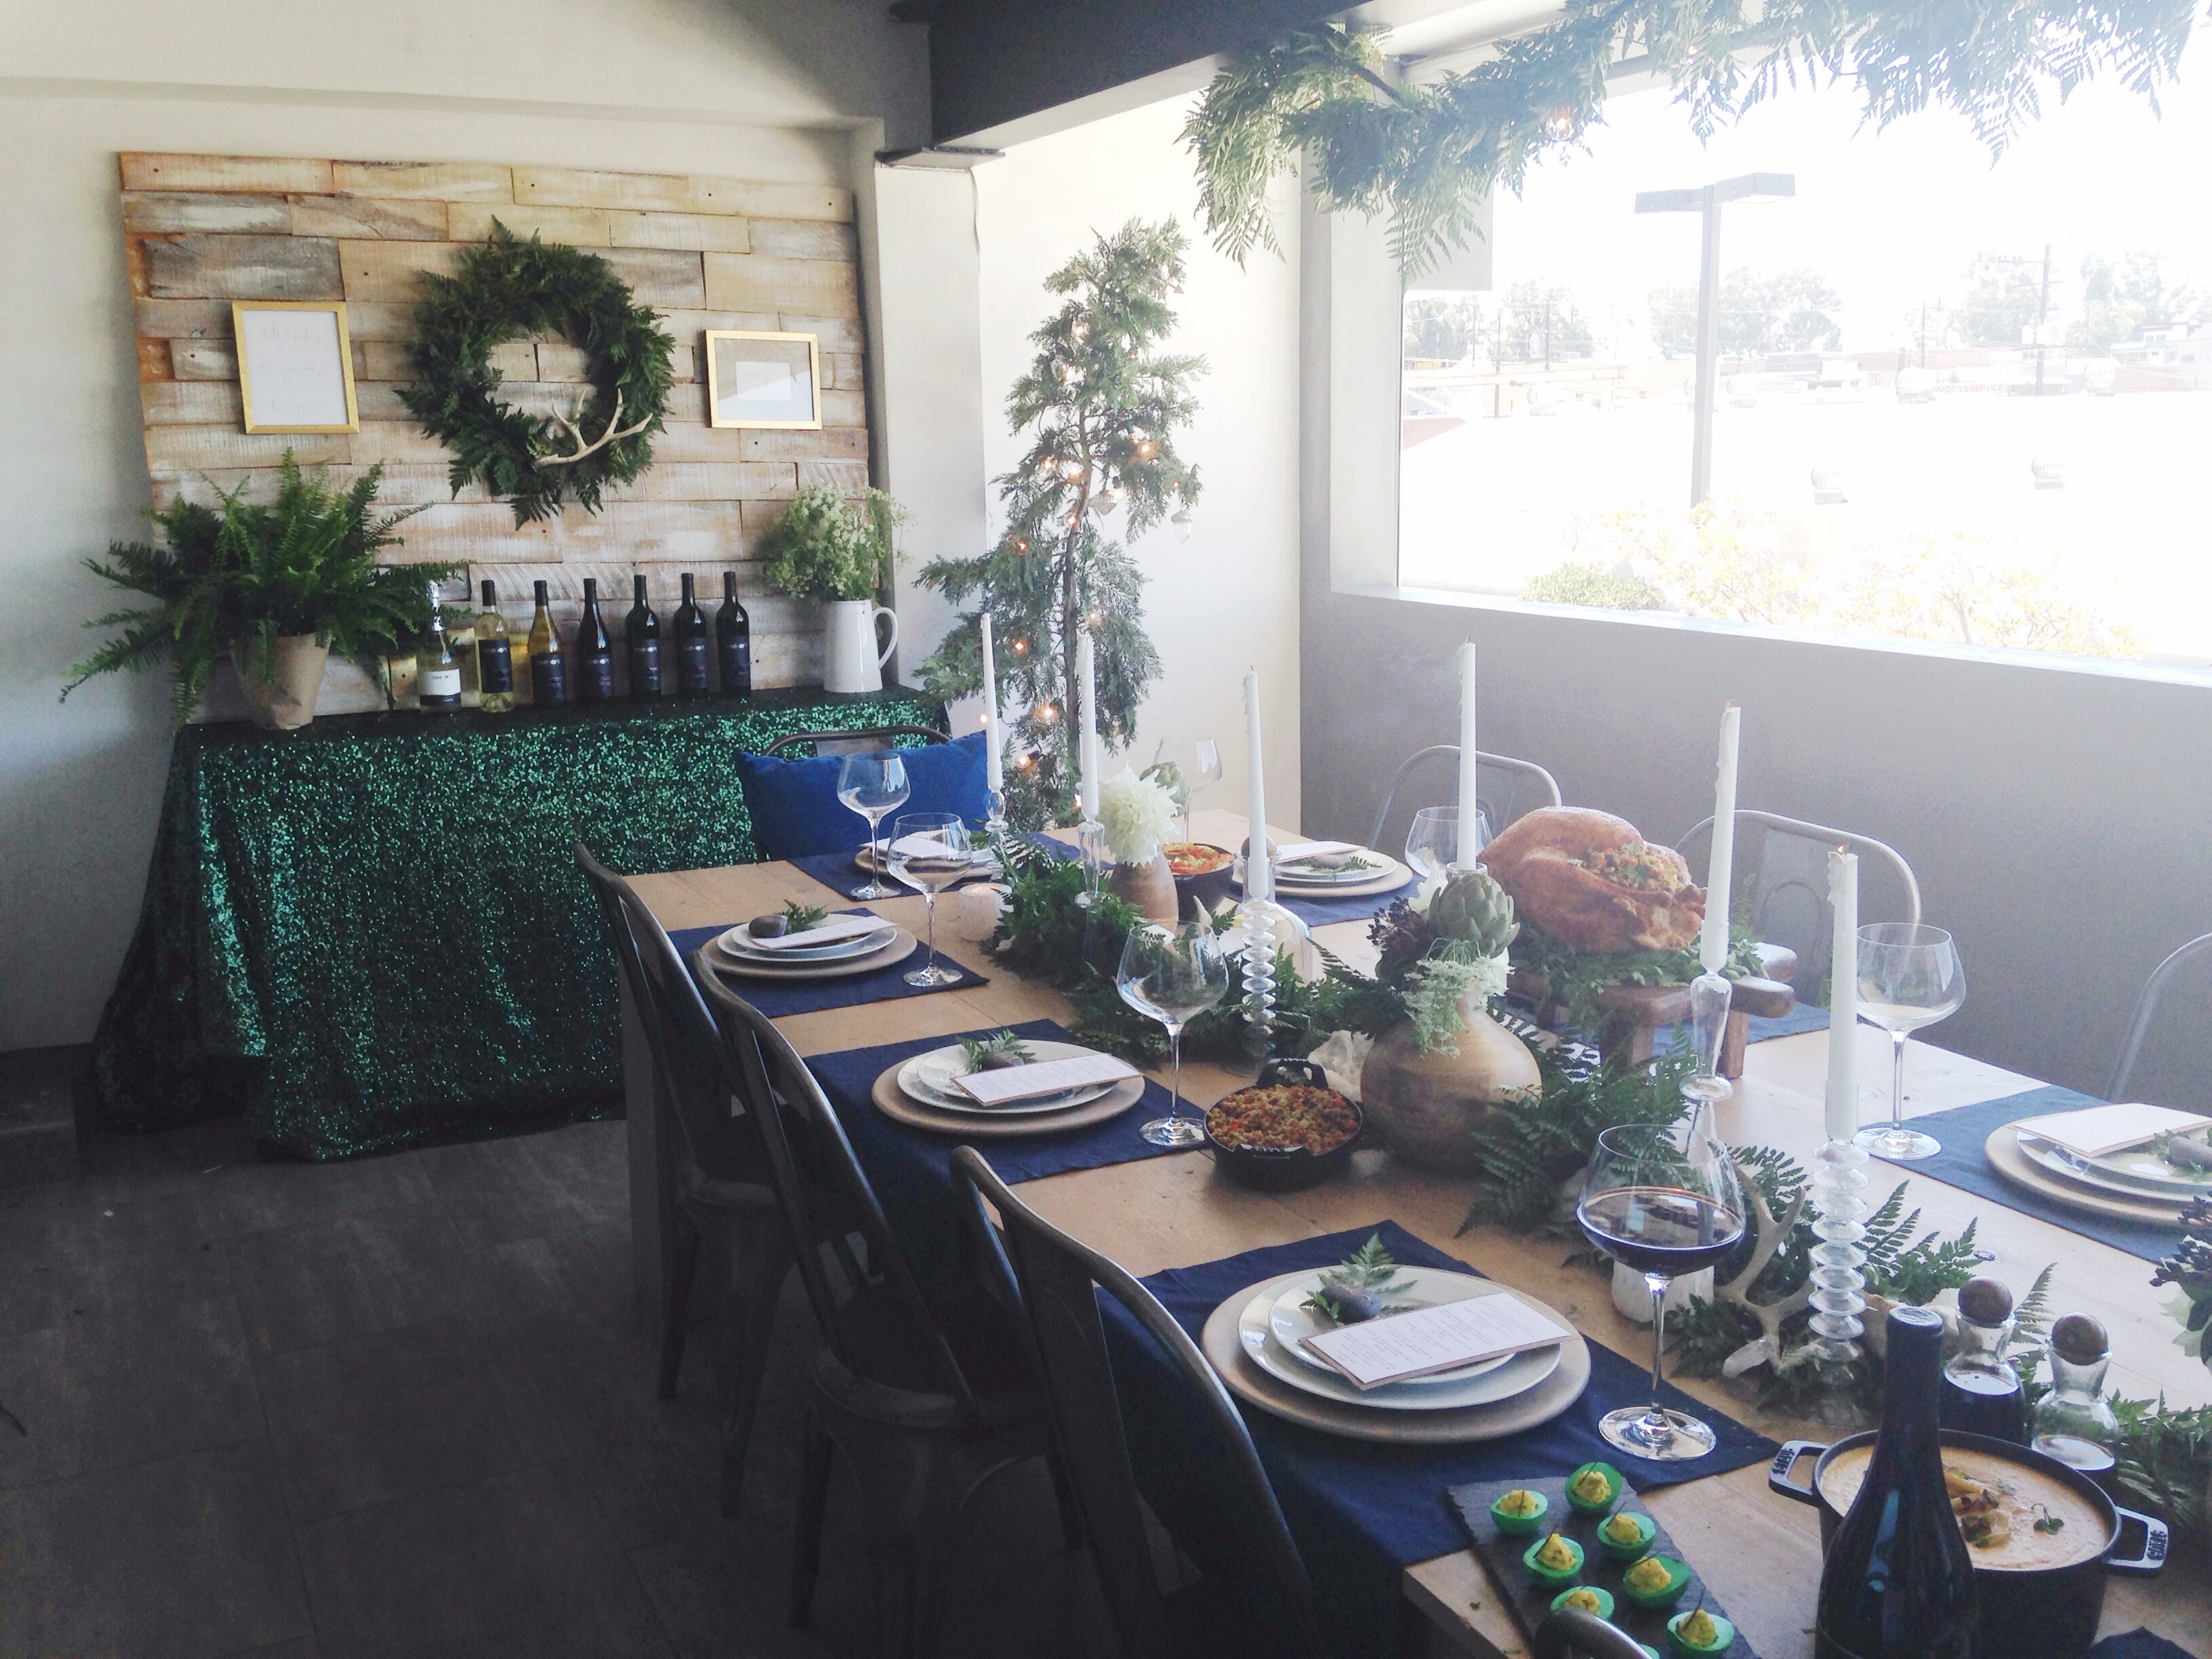
{Behind the scenes at yesterday’s NYE shoot featuring our glitter bottle with Zoom Theory!  By the end of it we were covered in confetti and champagne, but I’m stoked at how this turned out and can’t wait to share the final images.}

Cheers!

Design, Events, Interiors, Life, Wine Tagged With: behind the scenes, cats, champagne, christmas, december, decor, event design, events, glitter, holidays, home, interior design, kitten, photo shoot, pillows, sparkle, update, wine

DIY Yarn Fringe Backdrop

October 28, 2014

DIY-Yarn-Fringe-Backdrop

Creating a fun backdrop is one of the best ways to make a party picture perfect.  After making two for Blair’s 1st birthday party (and seeing it featured on Style Me Pretty!), I’ve been hooked on finding quick and simple ways to jazz up a focal area at parties and events.  I came across this on Pinterest and have been waiting for a time to replicate it and our Pink Party for work seemed like the best opportunity.  Since I wanted to make the party “fall-ish” while staying on theme with pink for Breast Cancer Awareness Month, the yarn fringe backdrop was actually the PERFECT way to bring all of the colors together.  I picked up seven different colors from our local Michael’s store with a 25% off coupon, purchased some dowels (and had them cut at our local hardware store) for under $5.  The entire project cost less than $25 and made such a fun statement at our party.  Here’s how you can recreate the look on your own 🙂

Supplies

Dowels
Yarn in various colors
Scissors

Instructions

1.  Cut your dowels to length.  If your dowels are longer than you’d like your finished length to be, cut them to size using a hand saw.  Or, simply ask your local hardware store to cut them for you which is what I did.  The sizes I went with were 24 inches and 16 inches.

2.  Decide what color yarn you will be using the most and cut it accordingly.  I knew we were going to be using mostly pink with a few strands of orange, yellow and white mixed in so I cut out much more pink in strands of ~48″.  Note: you will be folding your strands in half to attach it to the dowel so keep that in mind when cutting to length.  If you want your finished length to be 18″ cut your yarn at 36″.

Fringe DIY

3.  Fold yarn in half and pull the ends of the yarn through the loop and around your dowel.  Side loop to tighten and repeat.

Fringe-DIY-3

Fringe-DIY-4

Fringe-DIY-5

4.  Alternate colors as you see fit until you’ve filled the dowel with yarn.  Hang your yarn fringe behind a bar or dessert table (I even attached one to the table cloth) and have fun!  Cheers!

Pink-Party-Table-3

Design, Events Tagged With: art, DIY, event decor, event design, fringe, party, pink, tutorial, wine tasting, yarn

Fall Entertaining

October 1, 2014

Fall-Entertaining-Tablescape-2

Hip hip hooray!  It’s October 1st and I’m so excited to finally get to share the shoot I styled for ONEHOPE’s 2014 Fall Entertaining Guide perfectly captured by Brian Tropiano Photography. At work, I feel like we’re always flying by the seat of our pants and putting together content like this ahead of time has been a struggle.  This year, however, we managed to stay ahead of the game and shot everything in July to use for the remainder of the year.  Trying to determine what is going to be “in” before anything holiday related is even advertised or released in store is tough so instead I just decided to stick with my gut and curate items and elements that I really, truly love.  I wanted the room to feel like a forest so I incorporated a lot of wood textures, ferns, (faux) antlers, geodes and quartz tea lights down the center of the table.  On the wood backdrop behind the wine, was a wreath with an antler to tie the look together with an additional leather fern garland with bistro lights strung above the table.  We brainstormed for days on what to do instead of traditional place cards before we finally decided on stones – gold calligraphy on stones – to keep with the forest theme while adding a touch of elegance to each setting.  The overall messaging behind the day was “Hope, Thanks and Dreams” so Beth hand crafted an amazing dream catcher where guests’ thanks, hopes for the future and dreams were shared and attached with tiny clothes pins.  Menus were printed on archival matte paper with hope, dream or thanks hand inscribed on the top and florals were kept to a minimum with wooden vessels and a casual/handpicked mixture of dahlias, garden roses, viburnum berries, artichokes and greens.

Since the entire purpose of the shoot was to show how to integrate wine into your fall, Thanksgiving or holiday gathering, the day wouldn’t have been complete without some absolutely delicious and gorgeous fare crafted by 24 Carrots Catering.  24 Carrots is one of the biggest catering companies in the business and their food has never, ever disappointed at any event I’ve ever attended.  I was so impressed that they took our direction (a classic Thanksgiving meal) and creatively modernized it a bit while still staying in theme.  For example, I loved the juxtaposition of a modern beet dish served on a raw wood platter that you’ll see below.  Lastly, each of their dishes paired perfectly with one or more of our wines so find pairing suggestions and a few wonderful recipes below!  CHEERS!

Fall-Entertaining-Backdrop-2

Fall-Entertaining-Tablescape-4

DECOR TIP:  Chairs can make or break a look.  This shoot took place in our conference room and it’s usually filled with white task chairs that are functional for work, but we opted to replace them for this shoot and I’m so happy we did.  Using these metal industrial chairs from Found Rentals kept the look casual, but also uniform, which I loved.

Fall-Entertaining-Tablescape-3

Fall-Entertaining-Candles

DECOR TIP:  When designing a table on a budget, not only are garlands beautiful and always on trend, but they’re also the best bang for your buck. Seeded eucalyptus, lemon leaf, leather fern and bay leaf are all great options to consider.  Contact a flower mart or district in your area for bids, but depending on the greens you go with, garlands can run as little as $2.50-$7.00 per foot!

Fall-Entertaining-Place-Setting-Wine

Fall-Entertaining-Place-Setting-Close

Fall-Entertaining-Menu

DECOR TIP:  Menus aren’t always necessary, but they really add to a place setting and are so simple to create.  We whipped this one up Illustrator (but can easily be replicated in MS Word), printed it on nice paper and applied it to a piece of recycled kraft/corrugate paper that we picked up at Michael’s to tie in with the rest of the theme.  Menus are not only great for making pairing suggestions, but they are also the perfect place to tie in your theme or messaging of the evening.  Beth hand wrote thanks, hope or dream at the top of each menu to reiterate why we were all gathered that day.

Fall-Entertaining-Florals

Fall-Entertaining-Soup

Fall-Entertaining-Soup copy

Fall-Entertaining-Soup-Pairing-Notes

DELICIOUS Sauvignon Blanc can be found here.

Fall-Entertaining-Tablescape-3 copy

Fall-Entertaining-Turkey-2PAIRING NOTES:  Pinot Noir and Turkey are a natural pairing.  The savory herbs and spices on the roasted turkey are complimented by the spice-infused influences of the French oak in our Pinot Noir.

Fall-Entertaining-Turkey

DECOR TIP:  Since turkey is usually the main food element during Thanksgiving meals, I love that 24 Carrots used this legged platter to give it some height.  Pieces like this are readily available at Cost Plus, Pottery Barn or can be rented for the day from Found Rentals.Fall-Entertaining-Dream-Catcher

Fall-Entertaining-Dream-Catcher-2

Fall-Entertaining-Cheers-2

Fall-Entertaining-Potatoes

PAIRING NOTES:  The creamy texture and toasted oak notes of our Santa Barbara Reserve Chardonnay pair perfectly with the rich butter and cheddar cheese of this twice baked potato.

Fall-Entertaining-Poatatoes-2

Fall-Entertaining-Deviled-Eggs

PAIRING NOTES:  Eggs and Pinot Noir are a guilty pleasure not to be missed and Pinot is the perfect partner in crime for ham.

Fall-Entertaining-Tablescape-4 copy

Fall-Entertaining-Vegetables-Pairing

PAIRING NOTES (recipe below): The rich fruit and lively spice of our Pinot Noir adds some brightness to the earthy quality of these savory vegetables.

Fall-Entertaining-Vegetables-2

Thyme Infused Roasted Root Vegetables by 24 Carrots Catering

Yield: 4 servings

Ingredients

2 lbs mixed root vegetables (we use baby carrots, the smallest parsnips you can find and a mix of yellow and red beets)
Olive oil, to taste
Salt + pepper, to taste

Balsamic Thyme Vinaigrette Ingredients

2 tablespoons olive oil
6 tablespoons thyme minced
2 tablespoons white balsamic vinegar
2 tablespoons minced parsley
1 teaspoon cumin, toasted and ground
2 tablespoons honey
2 tablespoons miso paste

Directions

Gently peel the carrots and parsnips. Leave them whole if they are all the same size – if not, chop the larger veggies to equal the size of the smaller ones. Peel and chop the beets into rough cubes, about 1-inch all around.

Place all the vegetables onto a baking sheet. Season with salt and pepper and drizzle lightly with olive oil. Place in a 400°F degree oven and bake for about 20-25 minutes, shaking them periodically for even cooking. Remove from oven when soft, slightly brown and caramelized.

Meanwhile, prepare the balsamic thyme vinaigrette. Place all the ingredients aside from the oil in a mixing bowl. Drizzle in the oil while whisking to combine. Season to taste.

Drizzle dressing all over the vegetables to coat, return to the oven and caramelize for five more minutes.

Fall-Entertaining-Wine-Pour

Fall-Entertaining-Stuffing-Pairing

PAIRING NOTES: The savory, meaty essence of the sausage pairs perfectly with spicy and herbal characteristics of our Zinfandel.

Apple Sage Cornbread Stuffing by 24 Carrots Catering

Yield: 6 to 8 servings

Ingredients

Cornbread, recipe follows
10 slices oven-dried country white bread
8 tablespoons butter
2 cups celery, chopped
1 large onion, chopped
2 granny smith apples ¼ inch, diced
1 lb apple sausage
7 cups chicken stock
1 cup Heavy cream
1 teaspoon salt
Freshly ground black pepper
3 tablespoons sage
1 tablespoon thyme
5 eggs, beaten

Cornbread Ingredients

1 cup self-rising cornmeal
1/2 cup self-rising flour
3/4 cup buttermilk
2 eggs
2 tablespoons vegetable oil

Directions

Preheat oven to 350 degrees F

In a large bowl, combine crumbled cornbread, dried white bread slices and set aside.

Melt the butter in a large skillet over medium heat. Add the sausage and brown, then add the celery, onions and apples and cook until transparent, approximately 5 to 10 minutes.

Pour the mixture over cornbread mixture. Add the stock and cream, mix well, taste, and add salt, pepper to taste, sage, and thyme.

Add beaten eggs and mix well. Pour mixture into a greased pan and bake until dressing is cooked through, about 45 minutes. Serve with turkey as a side dish.

Cornbread Directions

Preheat oven to 350 degrees F.

Combine all ingredients and mix well. Pour batter into a greased shallow baking dish. Bake for approximately 20 to 25 minutes. Remove from oven and let cool.

Fall-Entertaining-Stuffing

Fall-Entertaining-Table-Wine-2

Fall-Entertaining-Biscuits

Fall-Entertaining-Buscuits-2 copy

Fall-Entertaining-Biscuits-Pairing-Notes

Cranberry Lemon Herb Butter by 24 Carrots Catering

Ingredients

1/4 cup mixed herbs, such as flat-leaf parsley, chervil, tarragon, and chives, chopped
1 stick (1/2 cup) unsalted butter, softened
1/2 cup cranberries, dried
1 teaspoon cranberry sauce
1 teaspoon finely grated lemon zest

Directions

Chop cranberries then add herbs on a work surface. Add butter cranberry sauce and lemon zest. Finely chop together until well combined. Season with salt.

Transfer to a sheet of parchment paper, placing on edge closest to you. Fold paper over and roll into a cylinder, twisting the ends; wrap airtight in foil. Chill until solid.

Fall-Entertaining-Candles-2

Fall-Entertaining-Tablescape-5

Fall-Entertaining-Backdrop-Reserves-2

DECOR TIP:  Use as many potted plants as possible to achieve your look.  Mixing in small potted ferns, rosemary plants or succulents to your tablescape will keep the look interesting and will also make great favors to your guests.  While fresh cut flowers are always beautiful, they’ll also perish a few days later while a potted plant will flourish and will serve as a happy reminder of your gathering with loved ones.  While not for everyone, trees also make a huge statement.  The cedar tree pictured behind me in the photo below was purchased from a local nursery for $20!  Fall-Entertaining-Beets-3

Fall-Entertaining-Beets copy

PAIRING NOTES: The earthy tones of the beets and the tartness of the goat cheese are complemented by the lush, dark berry fruit of our Cabernet Sauvignon.

Fall-Entertaining-Beets-2

Fall-Entertaining-Florals-2

Fall-Entertaining-Pecan-Pie-2

Fall-Entertaining-Pecan-Pie-Pairing

PAIRING NOTES: The candied red fruit characteristics and the bright acidity of our Merlot help cut through some of the richness of this luxurious pie.  The bright acidity and zesty citrus notes of our Sparkling Brut would be a fantastic match for the rich, sweet character of the pie.

Fall-Entertaining-Pecan-Pie-3

DECOR TIP:  To keep your look interesting and “collected” opt for pieces that still fit your aesthetic, but aren’t too “matchy matchy”.  I love this vintage galvanized pie/cake stand 24 Carrots used for their Pecan Pie.  That tiny hint of metal tied in perfectly with the iron chairs we selected from Found Rentals.

Fall-Entertaining-Pecan-Pie-5

Fall-Entertaining-Plating

Fall-Entertaining-Vegetables-4

Fall-Entertaining-Wine-Pour-2

Fall-Entertaining-Soup-4

Fall-Entertaining-Biscuits-Butter

Fall-Entertaining-Turkey-5

Fall-Entertaining-Table-Wine

Fall-Entertaining-Cheers

Photography: Brian Tropiano Photography
Calligraphy & Dream Catcher: Beth Phillips
Rentals: Found Rentals
Linen: La Tavola
Styling, Florals & Decor: Yours truly 🙂

Design, Dine, Events, Fall, Wine Tagged With: antlers, autumn, cabernet, champagne, chardonnay, christmas, decor, design, entertaining, event design, events, fall, ferns, interior design, merlot, photography, pinot noir, reclaimed, sauvignon blanc, tablescape, thanksgiving, turkey, wine

#ONEHOPEHoliday / Snippets from last week…

July 28, 2014

photo 1

Happy, happy Monday!  I hope your week is off to a wonderful start!  Last Wednesday we had our “Christmas in July” / ONEHOPE Holiday shoot for ONEHOPE and the days leading up to it were an absolute blur.  From planning to flower arranging and driving all over LA to pick up rentals, it was a chaotic week!  While I’m glad to have the stress of it behind me, seeing everything come together for just the few hours of shooting sometimes doesn’t feel like enough.  Our table scape ended up being so beautiful that I couldn’t bear the thought of tearing it apart for a few days… even if it meant we had some wilted dahlias and crispy ferns as eye sores for Thursday and Friday.  If you follow me on Instagram, I’m sure you’ve already seen a few of these, but I just wanted to pass along some snippets of last week.  Can’t wait to share the professional images (hopefully this week) as well as some of the inspiration behind the day 🙂

Cheers!

photo 2

photo 3

photo (9)

photo 4

Design, Dine, Events, Floral, Wine Tagged With: christmas, decor, design, entertaining, event design, fall, holiday, home, instagram, iphone photos, photo shoot, table scape, thanksgiving, winter

DIY Fringe Backdrop

June 18, 2014

Mix&Muddle-12

I LOVE a solid DIY with pretty turn-key results and this one is just that!  When our EVP of Sales, Tiffany, asked for my help throwing her adorable little girl’s 1st birthday party, I knew we were going to have some fun 🙂  This was the perfect opportunity for us to debut our Mimosa Bar set (Shhh! Details coming soon!) and I was dying to create a cool backdrop that we could shoot everything up against.  This entire project took about 3 hours from Home Depot run to finish so I’m thrilled with what we were able to create in such a short amount of time.

Fringe-Backdrop-DIY

Supplies

Tissue paper in assorted colors
Panel Board
2- 2×4’s (8ft.)
Drill
Screws + Bolts (I used 2″)
Staple Gun + Staples (light duty)
Measuring tape
Paper chopper

Instructions

Before you begin your backdrop, determine how large it needs to be.  We wanted ours to be 8′ tall and to line up with the entire width of Tiffany’s buffet table (~60″).  Knowing that, I purchased 2 pieces of panel board (as one wouldn’t be big enough to cover the entire surface area between the top of the 8′ 2×4’s and the top of her buffet (~5′-6″).  I had the panel board cut to size at Home Depot and we were ready to go!

1.  Once your supplies are home, lay out the panel board and the 2×4’s and make sure the panel board is square with the legs.

2.  Drill large enough holes through the 2×4’s and into the panel board for your screws to slip into, but don’t attach the legs yet (that will be your last step).

3.  Remove the legs from your workspace to get them out of the way and determine how thick you want each row of fringe to be.  We decided that we wanted each layer of fringe to be about 8″ tall which perfectly worked out to be 1 piece of tissue paper folded long ways (hotdog style).  We didn’t want to be able to see the wood panel board when the fringe blew, so we layered each row first.  Starting at the BOTTOM of your board, fold 1 piece of tissue paper in half (so that you have two layers and staple it in place).  It might take 2-3 pieces of tissue to make it all the way across your panel board.  Don’t worry about the seams – no one will ever see them once you have covered up this layer with fringe 🙂

4.  Create your fringe layer and apply.  To create the fringe, we took 2 sheets of tissue paper, folded them hotdog style (so that we had 4 layers of tissue) and using the paper chopper, we sliced the paper in 1″ sections.  Be sure to stop slicing about 1-2″ from the crease.   This was the most time intensive part of the project.  However, using a paper chopper will make the process so much faster and will make your fringe even and much more professional looking 😉  Apply your fringe with a staple gun (across the top along the crease) and repeat all the way across.

5.  Once you have applied your first row of fringe, repeat steps 3 and 4.  Just a little tip… we thought it looked best if we covered up the top inch or so of the previous layer of fringe with our next color of tissue (see picture for detail).  That way, the transitions aren’t so harsh between colors and you cover up any inconsistencies along the top (below the crease) with the cuts you did to create the fringe.

6.  When you’re ready, carefully stand your panel board up with another person.  Be careful not to step on any fringe… it will tear off SO easily!  It might be easiest to lift your board slightly and slide the legs underneath to attach them.  Either way, just be careful not to tear or crease any of your pretty fringe.

Put your backdrop into place and….voila!!!  I can’t wait to share the images from the full party!  We were covered by Style Me Pretty Living and the feature is the absolute cutest!

PS:  The Mimosa Bar in the pictures can be purchased here, but more on that later too 🙂  xo

Mix&Muddle-17


Events Tagged With: birthday party, color, decor, design, event design, events, fringe, home, pink

Lately / Seeing Pink

January 27, 2014

In case you don’t follow my work Instagram, here’s a little peek into my life lately… Valentines Day Insta 7

{Product samples and shoot inspiration on my desk}

Valentines Day Insta 3

{A little nail art and summery sangria during last week’s heatwave in LA}

Valentines Day Insta 10

{Ban.do Mini Hearts arrive at the office – OBSESSED!}

Valentines Day Insta 5

{Valentine’s shoot day!  All set up and ready to go!}

Valentines Day Insta 6

{ONEHOPE ladies decorating heart sugar cookies and enjoying some Friday afternoon vino}

Valentines Day Insta 2

{Arrangements that I put together – pink and red ranunculus with red anemones in white vessels. PS: How rad is that chevron runner from La Tavola?}

Valentines Day Insta 1

{Bird’s eye view}

Valentines Day Insta 9

{It’s all in the details}

Valentines Day Insta 8

{View of our pallet wall, chocolate fountain and lots of pink/red goodies!}

I’ve always been such a neutrals girl… until this year.  I’m currently so in love with Valentine’s Day and all things pink, red and sparkles and my desk at work is like an explosion of all things girly.  Thankfully, I got to take out some of my fem aggression on our VDay shoot for work (introducing our ruby red wine bottle) and couldn’t have had more fun.  We’re awaiting the professional photography, but had to share a few of my favorite iPhone pics in the meantime 🙂

Happy Monday! xoxo

Design, Floral Tagged With: chevron, decor, event design, home, love, photo shoot, photography, pink, red, shoot, valentine, valentine's day, Valentines, vday, wine

Thanksgiving Table Inspiration

November 16, 2012

When I came across this Thanksgiving table post on Camille Styles last week, I just about fell out of my chair.  I was floored by the chic, sophisticated and modern approach to Thanksgiving decor that McKenzie Powell took instead of the traditional, heavy Thanksgiving tablescapes that come to mind when I envision the holiday.  The gorgeous fall florals and orange tapers are just enough to keep the table warm and inviting, while the glass candlesticks, geometric napkins and hint of gold keep the look fresh and modern.  Bravo!  Our team is celebrating Thanksgiving together next Monday and here is my inspiration board for our own table modeled after McKenzie’s rendition (with my own little twist) of course 🙂


  • Vibrant fall florals arranged by yours truly as seen here.
  • Glass candlesticks from CB2.
  • Obsessed with this gorgeous (and massive) wishbone.  LOVE!
  • Gold rimmed glassware.  Swoon!
  • Gold chargers beneath modern white china.
  • Greek key fabric for napkins.
  • Love these gold mercury glass votives from one of my favorite sources – Jayson Home.

What will your Thanksgiving table look like?

Design, Dine, Floral, Interiors Tagged With: candlestick, chargers, design, event design, fabric, fall florals, flowers, interior design, mercury glass, table linens, tablescape, thanksgiving, votives, wine glasses, wishbone

  • Facebook
  • Instagram
  • Pinterest

Search

About Meg

subscribe via email

Insta Love

Shop Pillows!

Recent

  • Late Summer Gazpacho
  • 2018 Harvest Party
  • Life Lately: Golden Hour
  • Sauvignon Blanc Harvest / 2017
  • Fig + Prosciutto Salad with Almond Milk Ricotta

Favorites

Follow Along!

  • Facebook
  • Instagram
  • Pinterest

© Copyright 2025. Design.Wine.Dine.. All Rights Reserved. Design by Bloom.