Design.Wine.Dine.

  • About
  • Design
    • Interiors
    • Events
    • Floral
  • Wine
    • Cocktails
  • Dine
    • Fall
  • Life
  • Travel
  • Contact
  • Facebook
  • Instagram
  • Pinterest

DIY Yarn Fringe Backdrop

October 28, 2014

DIY-Yarn-Fringe-Backdrop

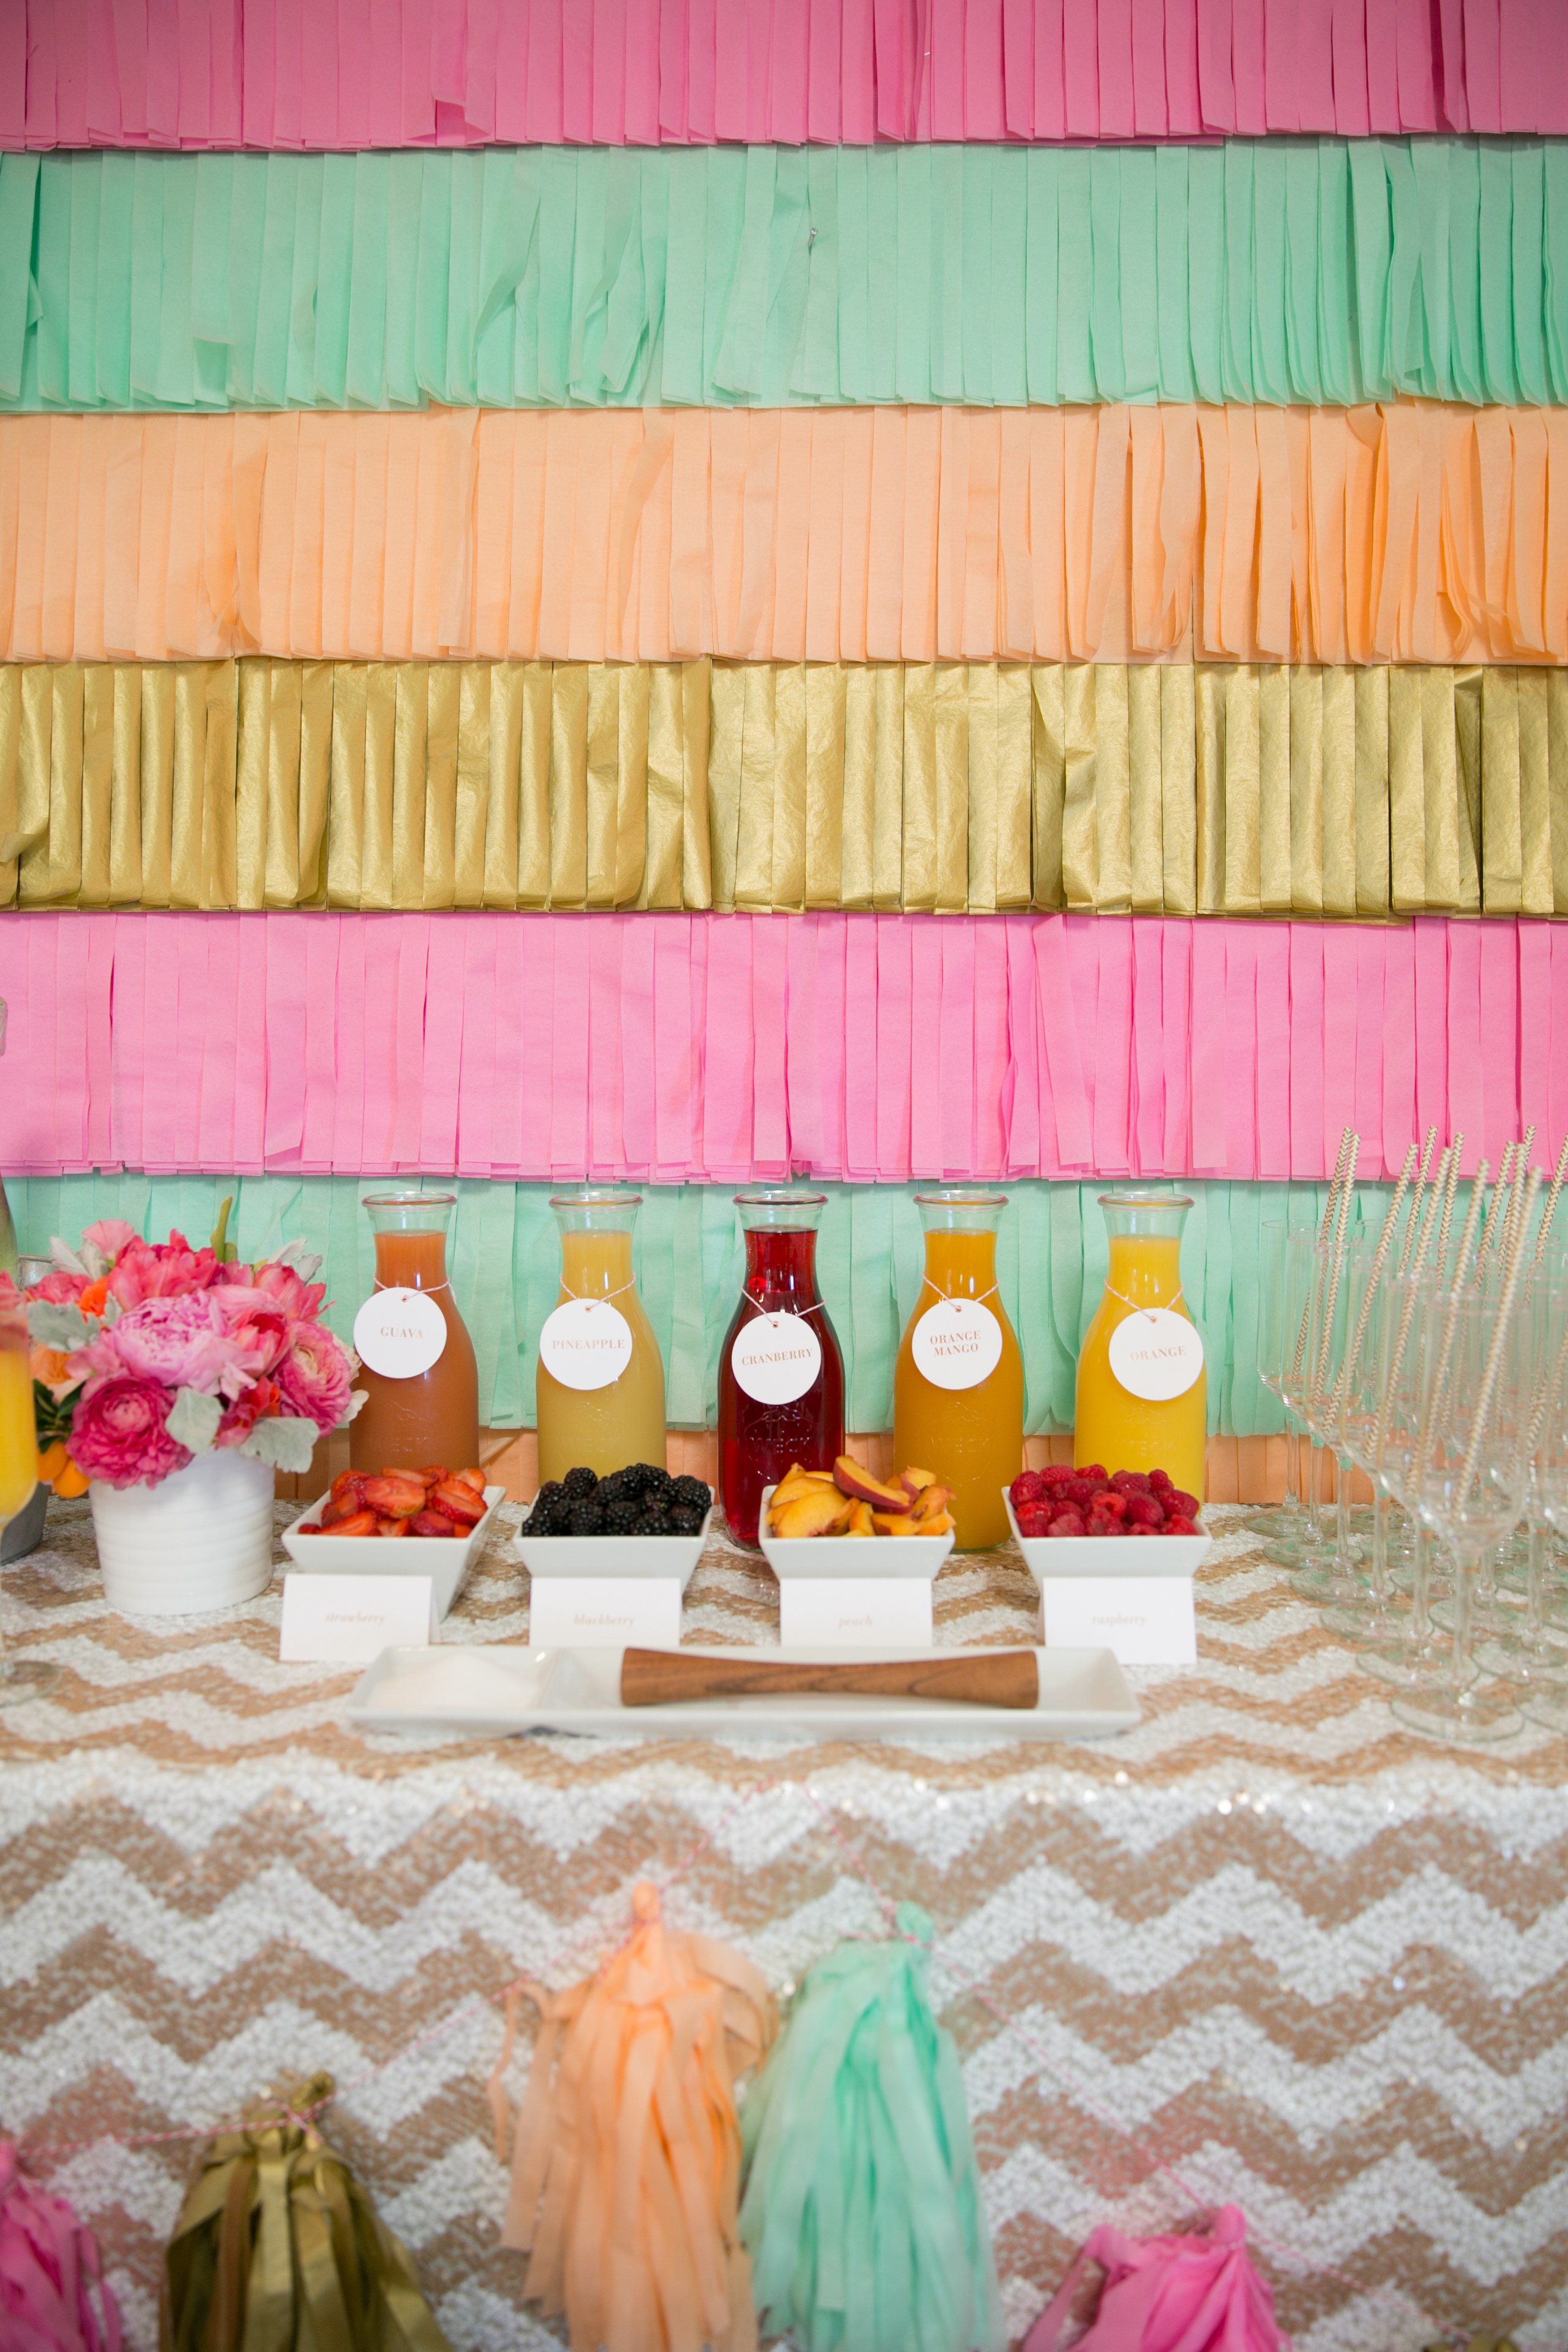
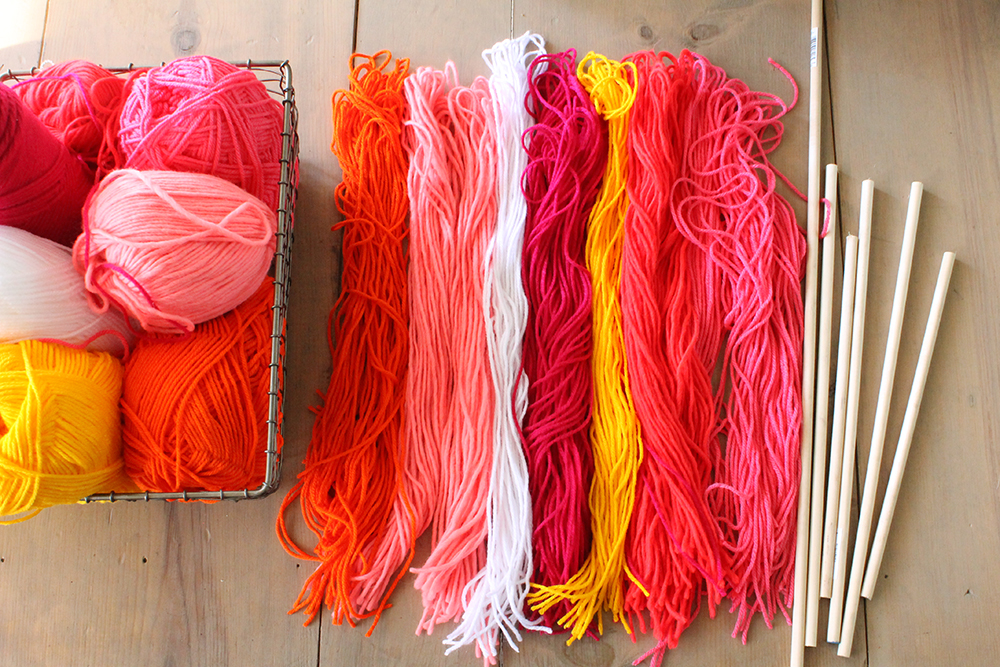
Creating a fun backdrop is one of the best ways to make a party picture perfect.  After making two for Blair’s 1st birthday party (and seeing it featured on Style Me Pretty!), I’ve been hooked on finding quick and simple ways to jazz up a focal area at parties and events.  I came across this on Pinterest and have been waiting for a time to replicate it and our Pink Party for work seemed like the best opportunity.  Since I wanted to make the party “fall-ish” while staying on theme with pink for Breast Cancer Awareness Month, the yarn fringe backdrop was actually the PERFECT way to bring all of the colors together.  I picked up seven different colors from our local Michael’s store with a 25% off coupon, purchased some dowels (and had them cut at our local hardware store) for under $5.  The entire project cost less than $25 and made such a fun statement at our party.  Here’s how you can recreate the look on your own 🙂

Supplies

Dowels
Yarn in various colors
Scissors

Instructions

1.  Cut your dowels to length.  If your dowels are longer than you’d like your finished length to be, cut them to size using a hand saw.  Or, simply ask your local hardware store to cut them for you which is what I did.  The sizes I went with were 24 inches and 16 inches.

2.  Decide what color yarn you will be using the most and cut it accordingly.  I knew we were going to be using mostly pink with a few strands of orange, yellow and white mixed in so I cut out much more pink in strands of ~48″.  Note: you will be folding your strands in half to attach it to the dowel so keep that in mind when cutting to length.  If you want your finished length to be 18″ cut your yarn at 36″.

Fringe DIY

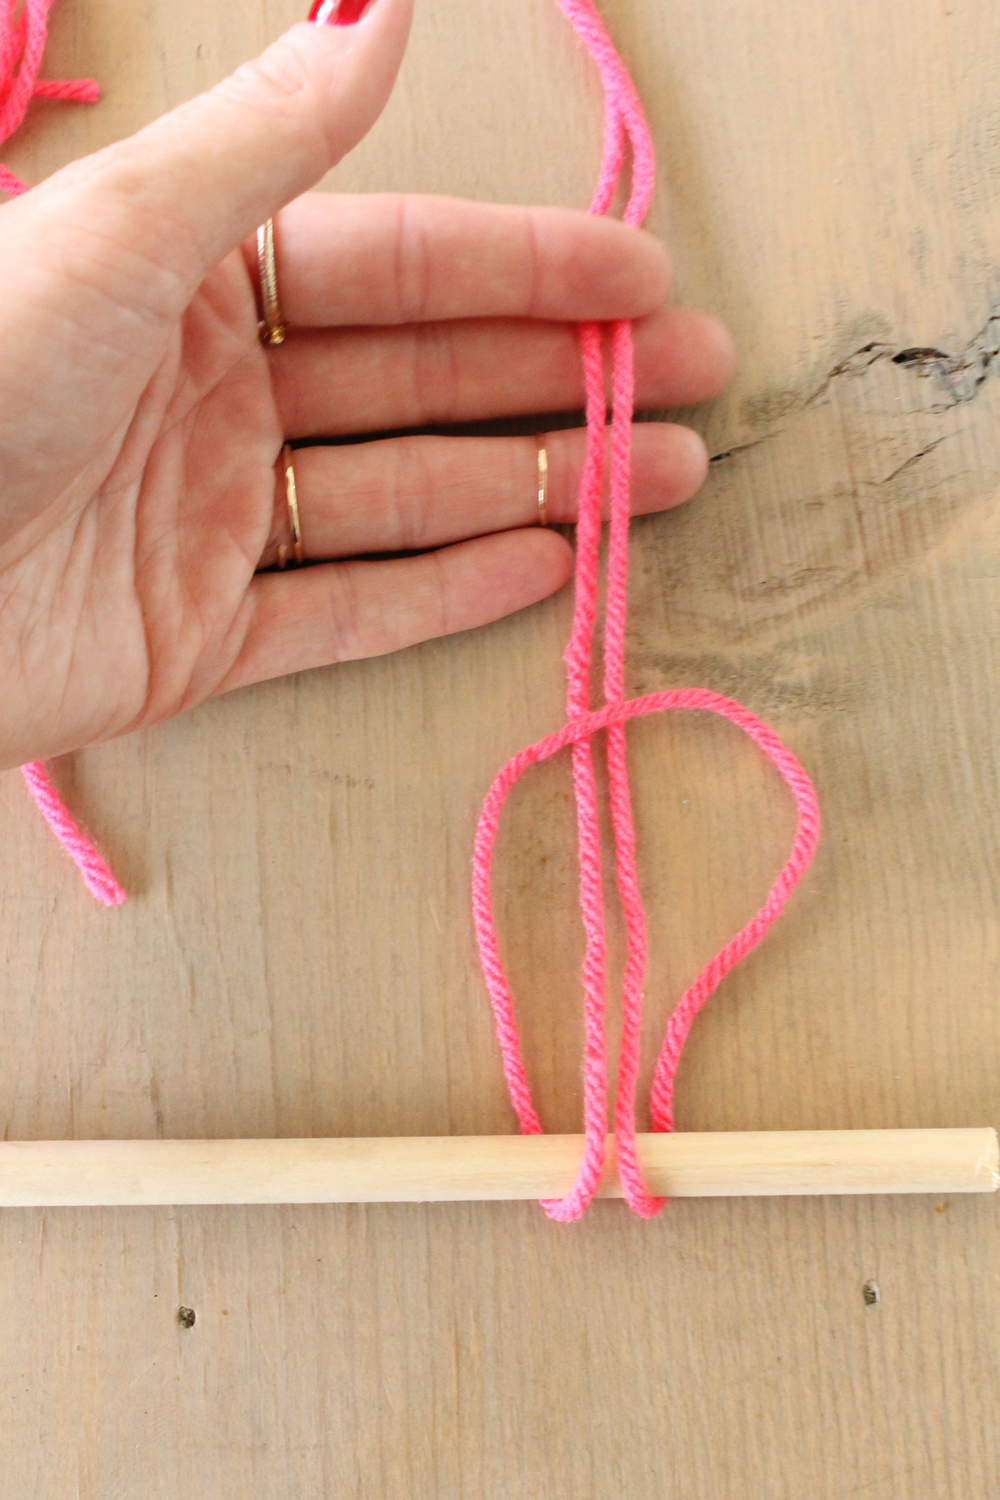
3.  Fold yarn in half and pull the ends of the yarn through the loop and around your dowel.  Side loop to tighten and repeat.

Fringe-DIY-3

Fringe-DIY-4

Fringe-DIY-5

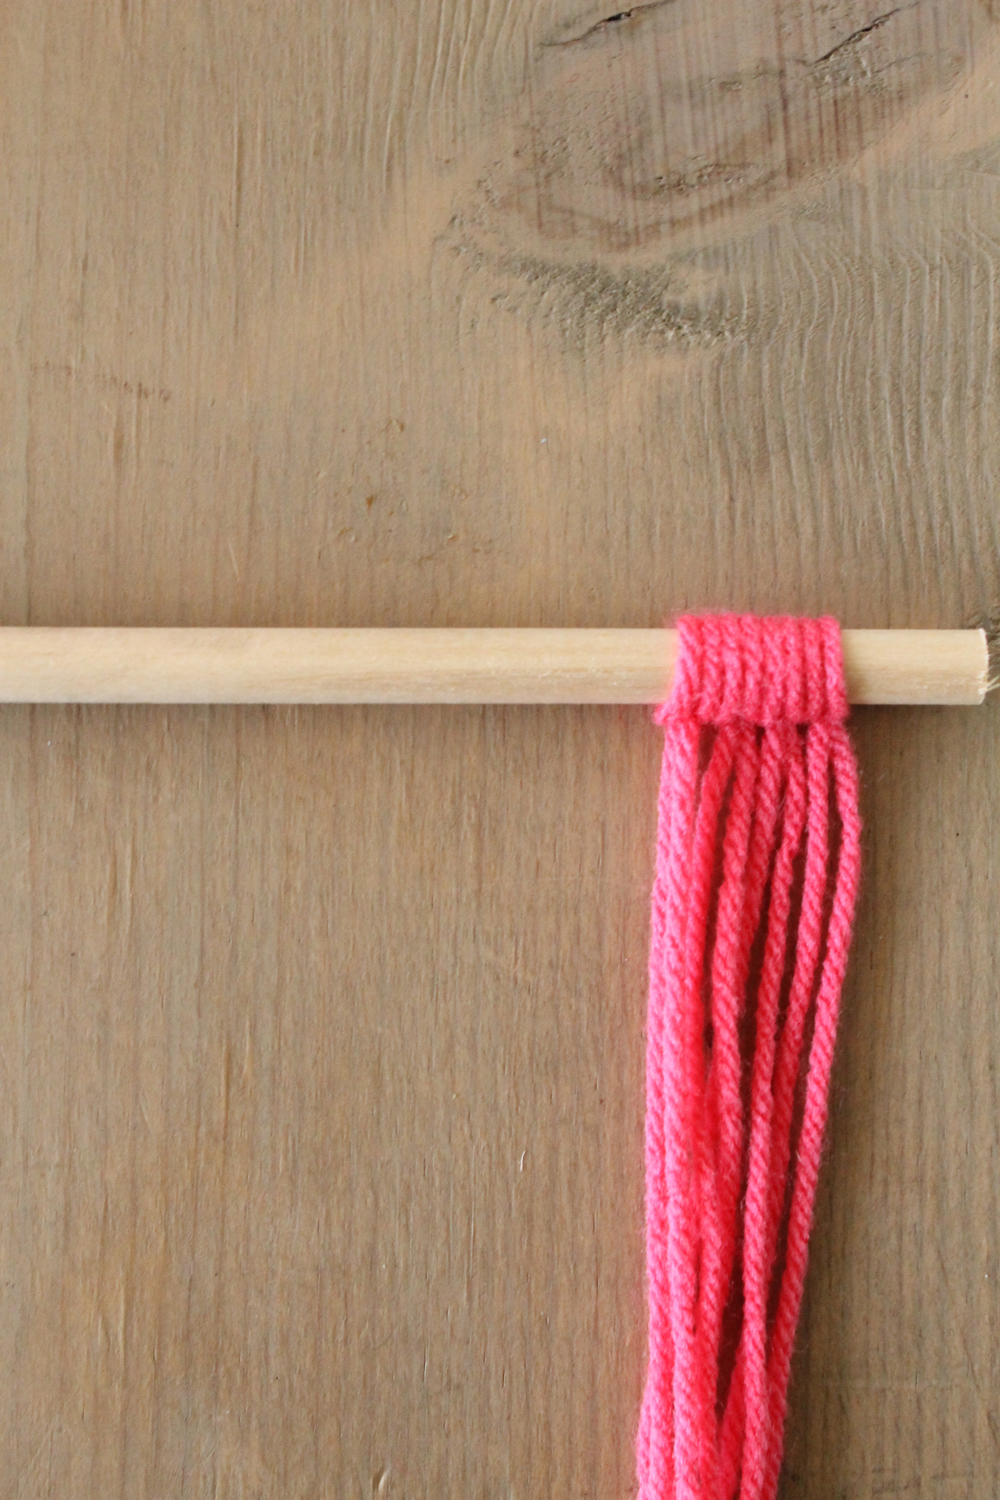
4.  Alternate colors as you see fit until you’ve filled the dowel with yarn.  Hang your yarn fringe behind a bar or dessert table (I even attached one to the table cloth) and have fun!  Cheers!

Pink-Party-Table-3

Design, Events Tagged With: art, DIY, event decor, event design, fringe, party, pink, tutorial, wine tasting, yarn

DIY Fringe Backdrop

June 18, 2014

Mix&Muddle-12

I LOVE a solid DIY with pretty turn-key results and this one is just that!  When our EVP of Sales, Tiffany, asked for my help throwing her adorable little girl’s 1st birthday party, I knew we were going to have some fun 🙂  This was the perfect opportunity for us to debut our Mimosa Bar set (Shhh! Details coming soon!) and I was dying to create a cool backdrop that we could shoot everything up against.  This entire project took about 3 hours from Home Depot run to finish so I’m thrilled with what we were able to create in such a short amount of time.

Fringe-Backdrop-DIY

Supplies

Tissue paper in assorted colors
Panel Board
2- 2×4’s (8ft.)
Drill
Screws + Bolts (I used 2″)
Staple Gun + Staples (light duty)
Measuring tape
Paper chopper

Instructions

Before you begin your backdrop, determine how large it needs to be.  We wanted ours to be 8′ tall and to line up with the entire width of Tiffany’s buffet table (~60″).  Knowing that, I purchased 2 pieces of panel board (as one wouldn’t be big enough to cover the entire surface area between the top of the 8′ 2×4’s and the top of her buffet (~5′-6″).  I had the panel board cut to size at Home Depot and we were ready to go!

1.  Once your supplies are home, lay out the panel board and the 2×4’s and make sure the panel board is square with the legs.

2.  Drill large enough holes through the 2×4’s and into the panel board for your screws to slip into, but don’t attach the legs yet (that will be your last step).

3.  Remove the legs from your workspace to get them out of the way and determine how thick you want each row of fringe to be.  We decided that we wanted each layer of fringe to be about 8″ tall which perfectly worked out to be 1 piece of tissue paper folded long ways (hotdog style).  We didn’t want to be able to see the wood panel board when the fringe blew, so we layered each row first.  Starting at the BOTTOM of your board, fold 1 piece of tissue paper in half (so that you have two layers and staple it in place).  It might take 2-3 pieces of tissue to make it all the way across your panel board.  Don’t worry about the seams – no one will ever see them once you have covered up this layer with fringe 🙂

4.  Create your fringe layer and apply.  To create the fringe, we took 2 sheets of tissue paper, folded them hotdog style (so that we had 4 layers of tissue) and using the paper chopper, we sliced the paper in 1″ sections.  Be sure to stop slicing about 1-2″ from the crease.   This was the most time intensive part of the project.  However, using a paper chopper will make the process so much faster and will make your fringe even and much more professional looking 😉  Apply your fringe with a staple gun (across the top along the crease) and repeat all the way across.

5.  Once you have applied your first row of fringe, repeat steps 3 and 4.  Just a little tip… we thought it looked best if we covered up the top inch or so of the previous layer of fringe with our next color of tissue (see picture for detail).  That way, the transitions aren’t so harsh between colors and you cover up any inconsistencies along the top (below the crease) with the cuts you did to create the fringe.

6.  When you’re ready, carefully stand your panel board up with another person.  Be careful not to step on any fringe… it will tear off SO easily!  It might be easiest to lift your board slightly and slide the legs underneath to attach them.  Either way, just be careful not to tear or crease any of your pretty fringe.

Put your backdrop into place and….voila!!!  I can’t wait to share the images from the full party!  We were covered by Style Me Pretty Living and the feature is the absolute cutest!

PS:  The Mimosa Bar in the pictures can be purchased here, but more on that later too 🙂  xo

Mix&Muddle-17


Events Tagged With: birthday party, color, decor, design, event design, events, fringe, home, pink

  • Facebook
  • Instagram
  • Pinterest

Search

About Meg

subscribe via email

Insta Love

Shop Pillows!

Recent

  • Late Summer Gazpacho
  • 2018 Harvest Party
  • Life Lately: Golden Hour
  • Sauvignon Blanc Harvest / 2017
  • Fig + Prosciutto Salad with Almond Milk Ricotta

Favorites

Follow Along!

  • Facebook
  • Instagram
  • Pinterest

© Copyright 2025. Design.Wine.Dine.. All Rights Reserved. Design by Bloom.