Design.Wine.Dine.

  • About
  • Design
    • Interiors
    • Events
    • Floral
  • Wine
    • Cocktails
  • Dine
    • Fall
  • Life
  • Travel
  • Contact
  • Facebook
  • Instagram
  • Pinterest

Weekend Project – Patio Garden

October 25, 2013

Last weekend, after returning home from New York, I was really adamant to finish something.  I’ve got a list of DIYs coming out of my ears, but really wanted to get one done, on the books and out-of-the-way.  Enter… our outdoor space.  When viewing our place for the first time, I was THRILLED when I stepped outside and my question of “oh, so this is a shared space?” was answered with “no, this would be all yours”.  Literally, you guys.  I was shaking with excitement.  I couldn’t get Jake on the phone fast enough.  I am obsessed with gardening (thanks to my mom for that gene) and I take no shame in enlisting friends to care for my little green kids as much as they do for Lily whenever I’m away.  Having a space that was so much bigger than ever before to create my own little garden by the beach?!  YES please.  Thankfully, after borderline stalking our now landlord, we got the apartment and I couldn’t wait to go to town.  We have a patio directly off of our bedroom as well as yard (glorified patio – not pictured) up some steps and behind our duplex.  Sold.  However, said patio was hideous when we moved in. HID.E.OUS.  Enter exhibit A:

IMG_0204

I told you.  Steps that needed to be stained, some RANDOM paint job going on there with a mixture of white and beige… But she had potential!  It was SPACE.  Real, live outdoor space of our very own that could be transformed into whatever we’d like.  The first thing on the list was to figure out what in the heck to do with the cinderblock walls.  Paint them?  Ideally, I wanted it to be a living wall to wake up next to (all Cameron Diaz like in The Holiday with electronic blinds that open with the sun shining in), but that seemed like a pretty lofty goal for a rental.  So, we needed to think of something else.  While running into Ikea one day for heavens knows what, I stumbled across the Applaro Outdoor Panel and knew I’d found a solution.  I figured out how many we’d need, bought them and since we got carried away with unpacking, traveling for work and life in general, there they sat until last weekend.  And then, finally came my little garden.

If you’re in a situation like us, here is what you need to create your OWN apartment garden with roughly $150.

Supplies

Ikea Applaro Outdoor Panel – Pot hooks included (3) $39
Ikea Socker pots (8) $0.79
Ikea white pots (2) $10.99 (no longer available online, but next size up here)
Masonry anchors + Bit $7
Total: $152.30

I already had most of the plants and the lanterns, as well as a drill and a level to make this all come to life, but factor in another $100 if you’re starting fresh.

Step 1: Hardware – I knew I was going to need a masonry bit as well as concrete anchors so I was able to find a package that included both the anchors and the right size bit to drill pilot holes for the anchors.  I bought some longer anchors too just in case the 1.25″ anchors were too short so that I wouldn’t have to run back out to the hardware store.

IMG_0208

Step 2: Place wall panels where you want them and make sure they’re level.  Since I was doing this by myself and since the panels were going to be resting on uneven brick pavers, this was honestly the hardest part.

IMG_0210

Step 3: Drill your pilot holes and screw in anchors to attach your panel.  This is pretty self-explanatory, but just make sure that you stop every once in a while to give your drill a rest.  I have a pretty inexpensive drill and while it’s amazing for the price, drilling through concrete/cinderblock is entirely different from wood or anything else I’ve ever done in the past.  And for the love of god, be CAREFUL when removing your bit.  It was SO hot from the friction and of course I wasn’t wearing gloves (idiot) and burned my fingers.  I’m fine, but that was no fun.

IMG_0213

Repeat until all panels are attached!  YAY!  Minus all of the crap to the left, the space is already starting to look so much better!  Now, time for the pots.  I decided to use the Socker pots from Ikea because a) they’re inexpensive b) they’re cute and c) they’re the perfect size for herbs and that is what was going in them.  However, they don’t have holes in the bottom for drainage or for hanging them on the hooks so you have to drill those manually.  Just make sure you use a bit suitable for metal.

IMG_0215

Step 4: Put your little plants in the pots and hang on your wall!  You’re almost done!

IMG_0217

Step 5: Dress up the weird empty bottom area without rungs with plants, lanterns, candles, pumpkins if it’s October… get creative!  Or, if you have the space, Ikea sells a storage bench that can attach to the wall panels.

IMG_0221

Tadaaaa!  I still need to re-pot the larger rosemary plant as well as the olive tree AND re-stain those darn steps, but I think she’s looking pretty cute for just a few hours of work.

And for good time’s sake… before and after!

Before After Garden

Design, Floral, Interiors Tagged With: apartment, DIY, garden, gardening, home, house, Ikea, life, living, outdoor space, tutorial

Team Thanksgiving Dinner

November 21, 2012

Last week I posted about our chic Thanksgiving Table inspiration for my company’s HOPEgiving celebration.  It’s the first time we’ve had a Thanksgiving dinner together so we really wanted it to be special in terms of food, wine pairings and decor.  Our Online Marketing Manager has been making Thanksgiving dinner for her family since she turned 18 so she planned (and cooked!) an insanely delicious feast for us while I took control over the tablescape.  The head of our Foundation has been wanting to write a new company manifesto, so we used the Holstee Manifesto cut up into bits to give everyone some inspiration with their place card.  We all wrote a line that we live by and pieced the puzzle together over dinner which made for some wonderful team bonding.  Lastly, our next big venture is ONEHOPE Coffee so I made sure to include some coffee beans mixed in with the florals as well as on everyone’s place setting as a reminder to be thankful for the incredible opportunities we have ahead.  I have to say, it was an absolutely magical evening filled with amazing food (and wine of course!), ONEHOPE family cheer and excitement for 2013!  What a great beginning to the holiday season!

PS: View Lauren’s to-die-for menu here and more on my tablescape and decor here 🙂  Happy Thanksgiving!!!

Design, Dine, Floral, Wine Tagged With: candles, coffee, company, feast, florals, food, gold, hopegiving, team, thanksgiving, vases, wine

Oh Monday!

November 19, 2012

The weekend was completely insane!  I painted, prepped for our company’s Thanksgiving dinner, painted again, went to an event and then painted some more.  I can not believe it’s Monday already… where was my weekend?!  On a lighter note, here’s a sneak peek of our #HOPEgiving dinner (follow us on Instagram and Twitter) tablescape.  I ran to the flower mart this morning and snatched up the last of the peonies along with some vibrant tulips, pin cushions and coffee beans.  LOVE.  The colors were just the warm yet modern punch of color we needed and I’m dying over the gold vessels, tapers, chargers and votives I was able to find over the weekend.  My vision came to life 🙂  More details to follow!  Hope you’re having a great Monday!

Design, Dine, Floral, Interiors Tagged With: coffee beans, flowers, gold, julep cup, peonies, thanksgiving

Thanksgiving Table Inspiration

November 16, 2012

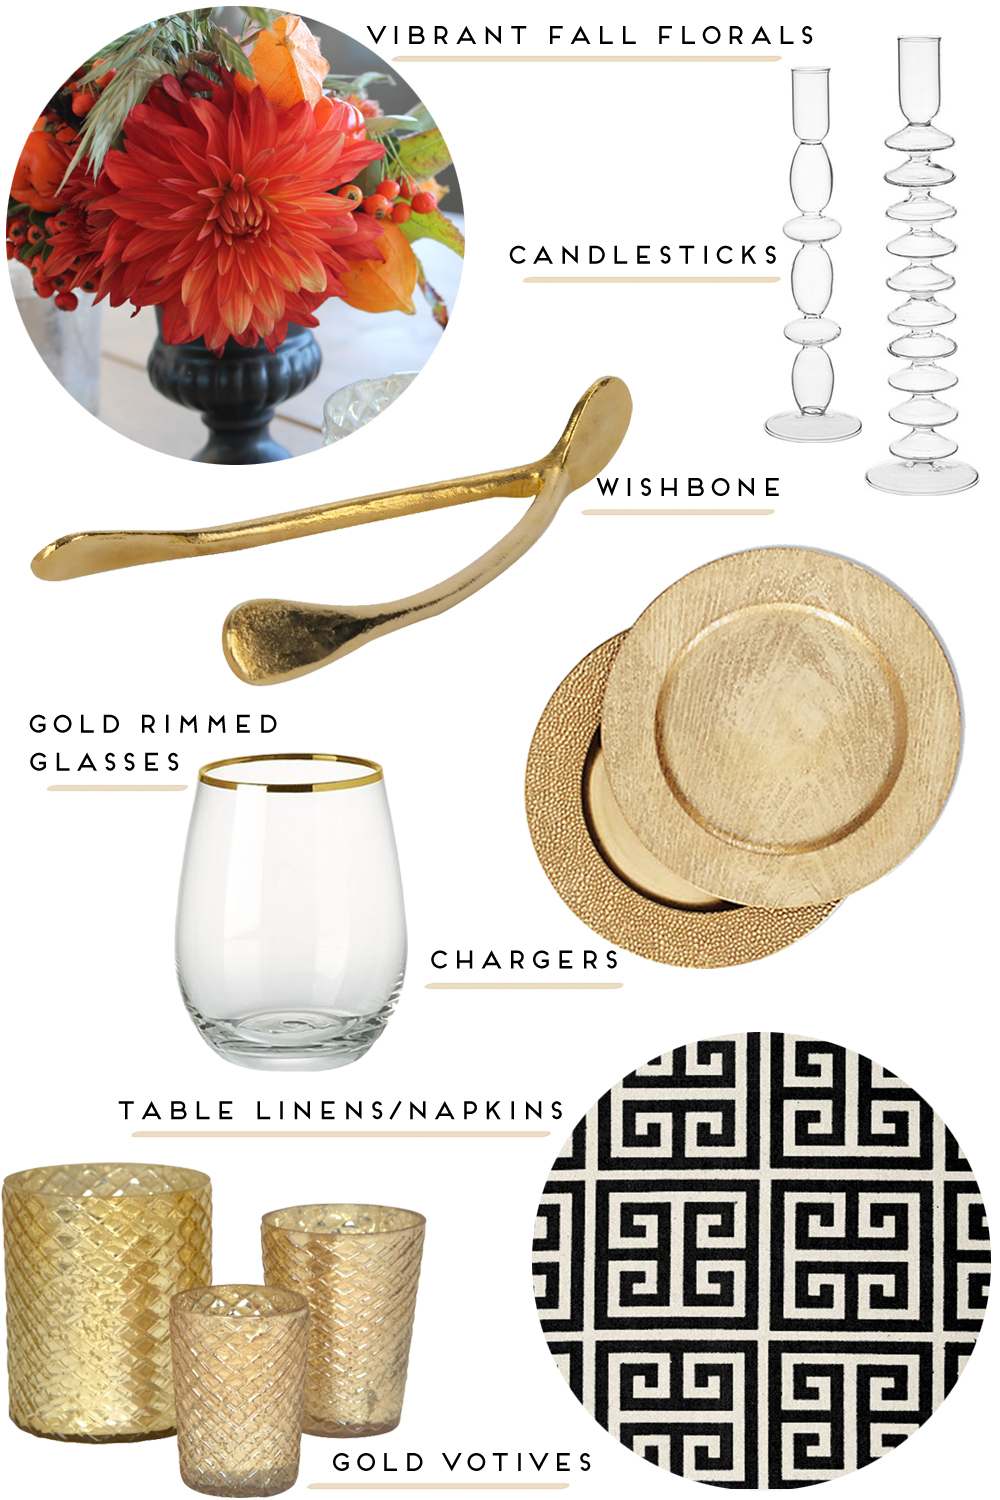
When I came across this Thanksgiving table post on Camille Styles last week, I just about fell out of my chair.  I was floored by the chic, sophisticated and modern approach to Thanksgiving decor that McKenzie Powell took instead of the traditional, heavy Thanksgiving tablescapes that come to mind when I envision the holiday.  The gorgeous fall florals and orange tapers are just enough to keep the table warm and inviting, while the glass candlesticks, geometric napkins and hint of gold keep the look fresh and modern.  Bravo!  Our team is celebrating Thanksgiving together next Monday and here is my inspiration board for our own table modeled after McKenzie’s rendition (with my own little twist) of course 🙂


  • Vibrant fall florals arranged by yours truly as seen here.
  • Glass candlesticks from CB2.
  • Obsessed with this gorgeous (and massive) wishbone.  LOVE!
  • Gold rimmed glassware.  Swoon!
  • Gold chargers beneath modern white china.
  • Greek key fabric for napkins.
  • Love these gold mercury glass votives from one of my favorite sources – Jayson Home.

What will your Thanksgiving table look like?

Design, Dine, Floral, Interiors Tagged With: candlestick, chargers, design, event design, fabric, fall florals, flowers, interior design, mercury glass, table linens, tablescape, thanksgiving, votives, wine glasses, wishbone

Restoration Hardware Spring Launch Party

March 27, 2012

Last Thursday, I was invited to attend the Restoration Hardware Spring Launch Party in LA (yes please) and it was gorgeous to say the least.  Their showroom on Beverly is nothing short of eye catching with a tremendous outdoor space attached and I’ve been looking for an excuse to drop in for a while now.  Everything about this space is absolutely perfect… from mirrored fireplace walls, to the reclaimed hardwood floors to the dark, fabric wall coverings cascading up the grand staircase.  Needless to say, as a huge Restoration Hardware lover, I was obsessed with nearly every room I walked into and had to capture a few (or 100) pictures to share.  Here are some of my favorites.

{The Cameraman asked if I wanted him to move his tripod so I could get this shot… trying to be polite, I said no, but now I really wish I would have said yes.  How amazing is this mirrored wall?}

{Restoration Hardware’s amazing signature crystal and iron chandeliers were a staple in this space}

{Stunning}

{Loved the continuous music sheet art as we walked from one room to the next}

{Beautiful orbs}

{Amazing idea for a non-working fireplace}

{Rustic farmhouse dining table + leather egg chair + spotlights = heaven}

{Naturally, I was drawn to this stunning floral display}

{Inspiration for my future store… wink, wink}

{Couldn’t get enough!!}

{The floral designer himself, Eddie Zaratsian}

{Please excuse me while I dive on in 🙂 }

{In love}

{Carrara}

{Gorgeous cascading bird cage chandeliers}

Design, Floral, Interiors Tagged With: design, floral, flowers, interior design, Restoration Hardware

Rainy Days

February 28, 2012

After a highly productive weekend that felt entirely too much like summer to be true, Monday blew in with a vengeance.  I woke up shivering yesterday morning to grey skies, wind and rain and would have given anything to pull the covers over my head for the remainder of the day.  Picking up a bundle of sunny daffodils at the market was just the cure I needed and some refreshing lemon/mint water at my desk was all it took to turn around my spirits.  Sometimes taking a moment to reflect on the simple pleasures in life is all we need to push through.  Hope your week is off to a great start!

{Check out some of my shots from my Sunday run here}

Floral, Interiors Tagged With: daffodil, desk, flowers, lemon, mint, office, rainy day

Winter Wedding Weekend in Telluride

February 23, 2012

I often have a hard time readjusting after taking a weekend break from this crazy city and our return from Telluride, CO where we witnessed our friends Phillip and Claire marry last weekend was no different.  The couple currently lives in London where Claire is an accomplished interior designer and Phillip is an attorney at a world-renowned firm.  Telluride is a very special place for both of them and I’m so happy to have experienced it for the first time.  Growing up enduring frigid Midwest winters, I could hardly imagine why anyone would ever vacation in a cold place.  After living in Southern California for a few years, however, I can completely understand and traveling to this tiny, snow-covered mountain town of 2,000 was nothing short of enchanting.  Here are a few of my favorite moments from last weekend that make me smile 🙂

{Stunning morning view from our condo}

{Downtown Telluride}

{Taking the gondola up for the first time}

{Gorgeous mountain views in every direction}

{ Rare blog picture of the boyfriend and I… thinking of this day makes me so happy 🙂 }

{The long descent back to Telluride}

{Exploring in the powdery snow}

{LOVED the cozy lodge feel and architecture}

{Refueling at 9545 in Mountain Village thanks to the suggestion of some friendly locals}

{Gorgeous flowers in the reception bar area}

{“Mr. & Mrs.”}

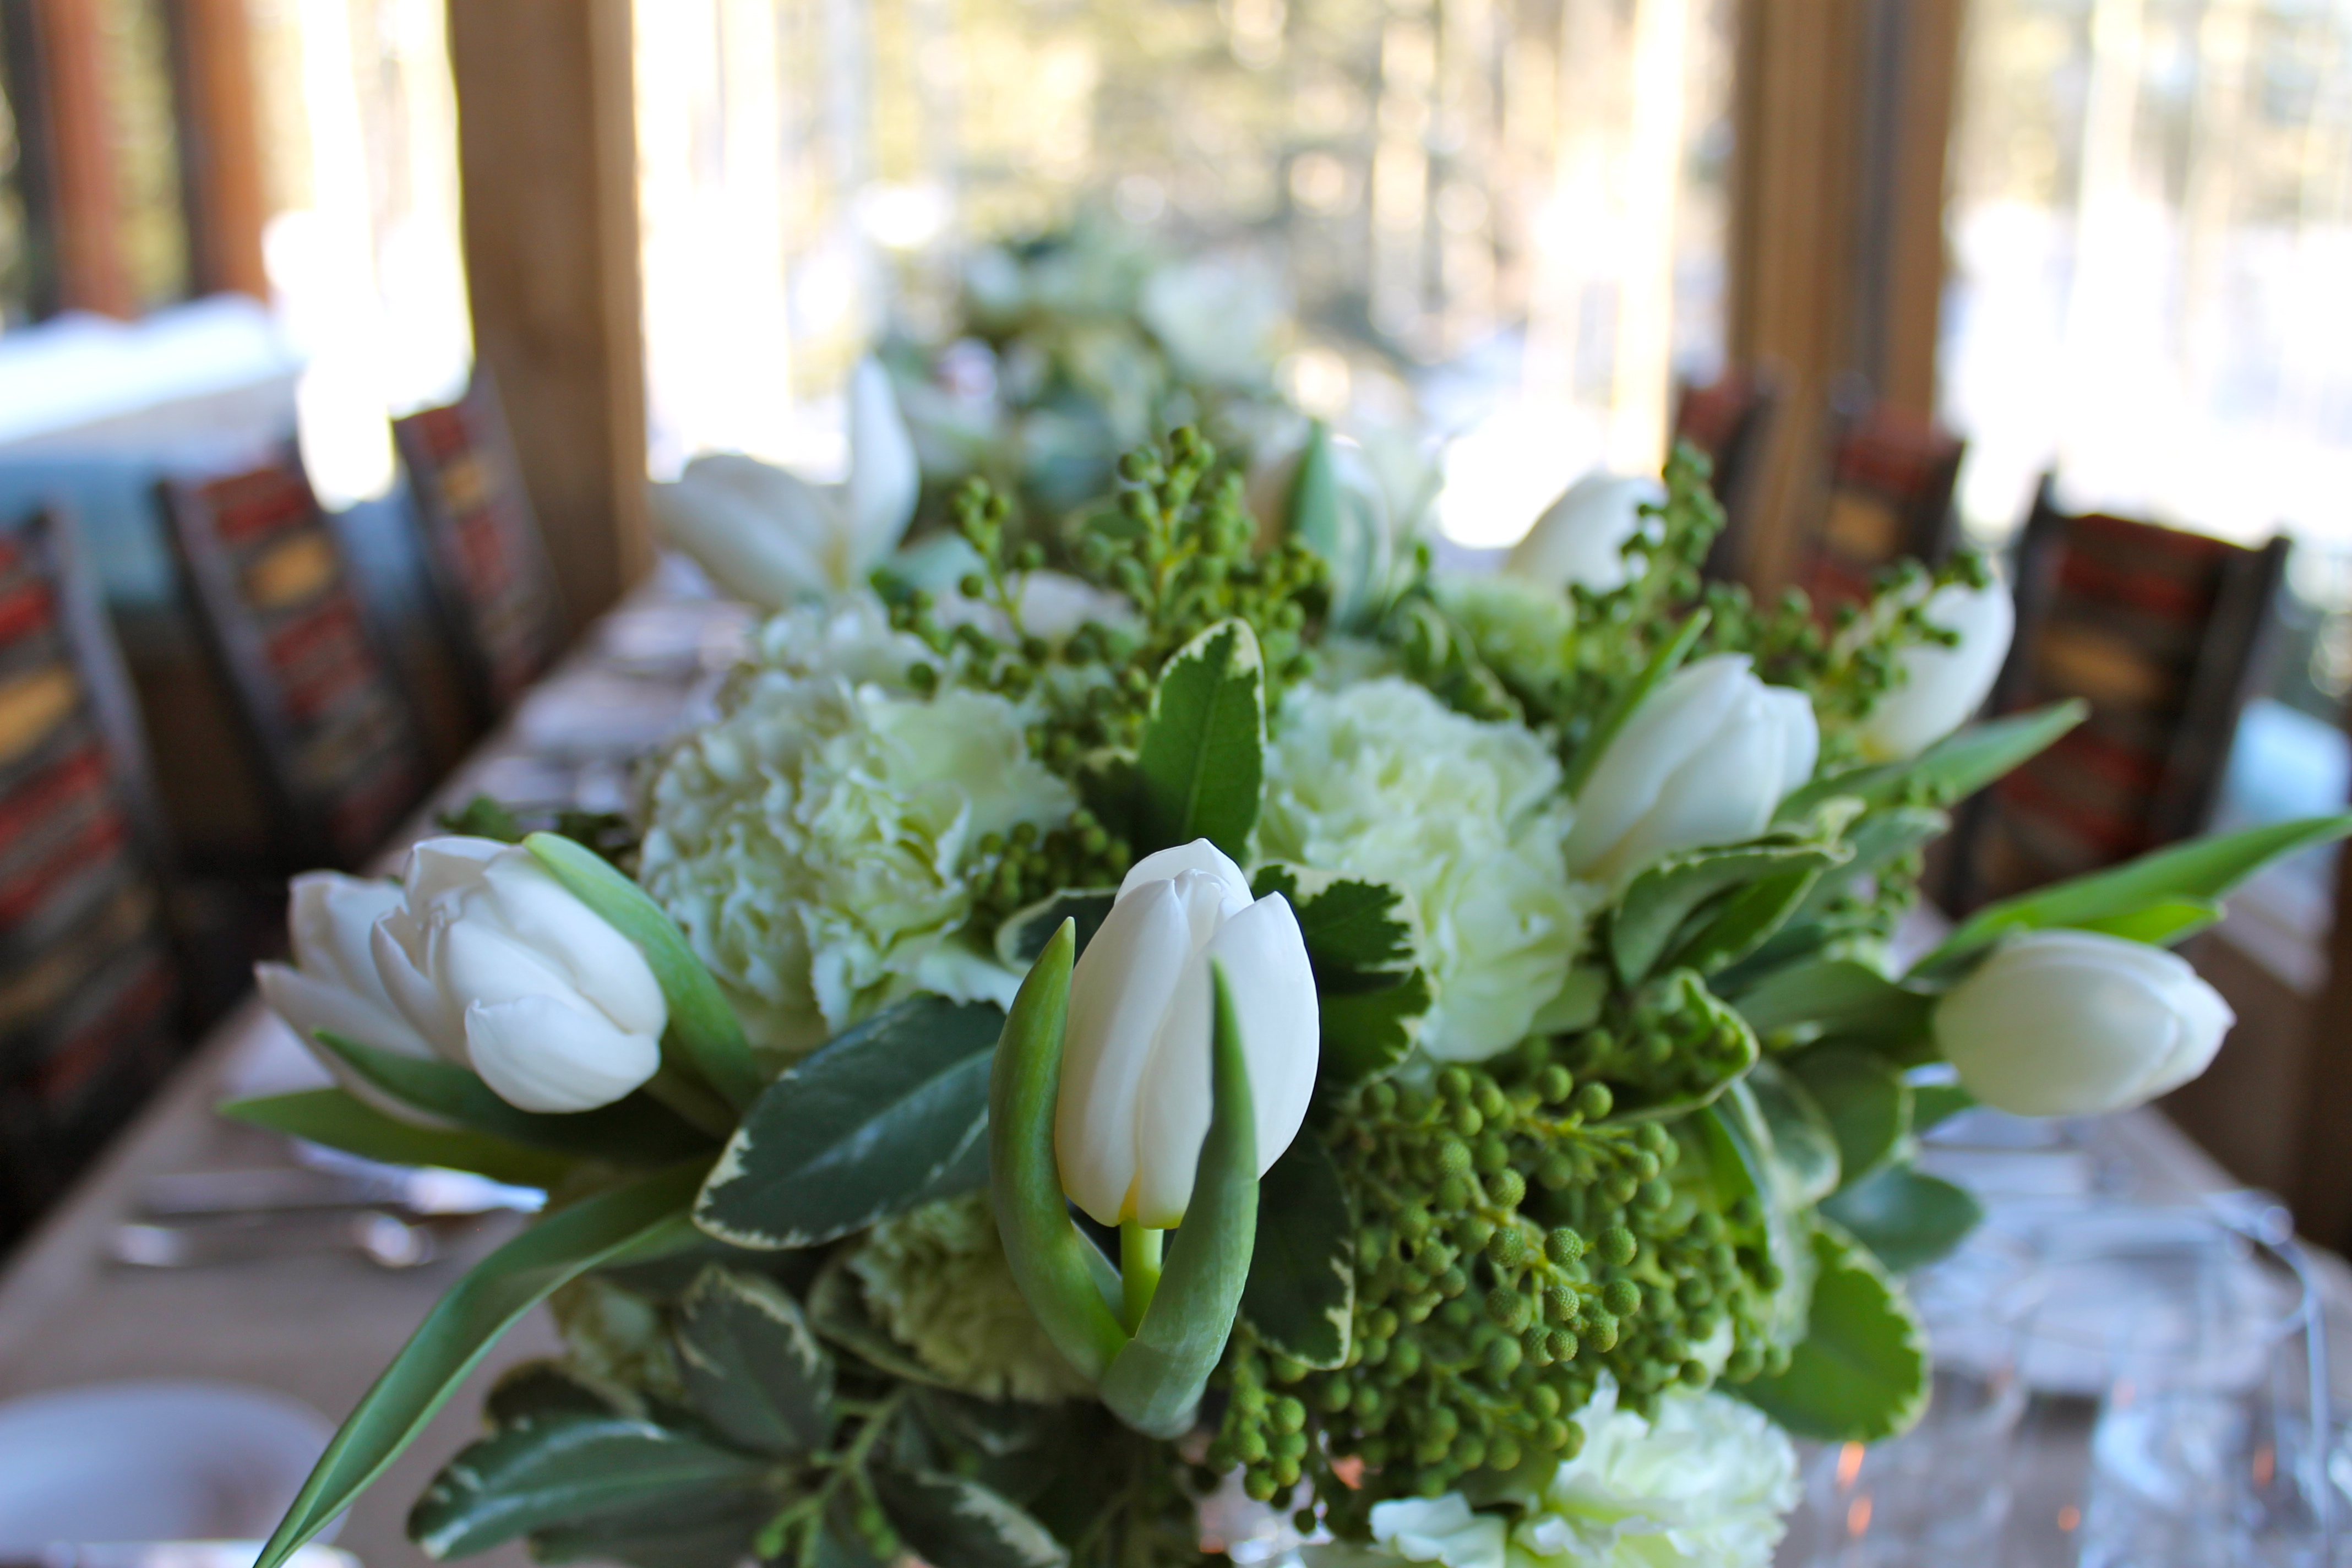
{White and green florals and mercury glass… stunning!}

{Beautiful tablescapes}

{Burlap tablecloths, white china, white florals, silver mercury glass accents… a gorgeous winter wonderland}

{Is there anything in the world better than lobster pastry puffs?!  I mean… come on!}

{Love}

{View from Allred’s at the top of the mountain}

{I’m a sucker for antler chandeliers}

{Delicious post wedding breakfast hangover cure at The Butcher & The Baker}

 {Southwest scramble}

{Gearing up for the looong drive home}

{Perfect AZ desert sunset to end our weekend}

Design, Dine, Floral, Interiors, Life, Travel Tagged With: colorado, design, fashion, flowers, food, snow, Telluride, travel, wedding

Flower Arranging Tutorial

February 15, 2012

After taking a bit of a flower hiatus over the holidays, I was really itching to get back to the Flower Mart and get my hands back to work.  My friend’s February birthday was the perfect excuse so I drove downtown early one morning last week as the sun rose and with my tea in-tow to pick up a bundle of blooms and got to work.  After posting about Katie and Chris last week, I received a few emails asking how I do it – How flattering!  Quite simply, the answer is two fold.  I was raised by the most amazing mother with a green thumb passed down from my Grandfather.  For as long as I can remember, her hands were outside and in the dirt every Saturday and Sunday tending to her garden and she would make the most amazing arrangements.  I learned so much from just watching her, but she’d always share little tricks and secrets with me.  Also, to be quite honest, flower arranging just comes really naturally to me and is really soothing.  I’m amazed at the beautiful things nature creates on its own and I’m overwhelmed with gratitude and joy (even in the stressful moments!) while working with flowers.  It might seem difficult, but thankfully, the steps from fresh-cut blooms to the reward of a gorgeous arrangement are fairly simple… and I’m going to share them in as much detail as possible today.

{From left to right: Succulents, Dusty Miller, Dahlias, Ellington/Korean Fir, Ranunculus, Wheat Grass, Thistle.  Not pictured above: White Hydrangeas}

1.  First and foremost, decide what flowers you’re going to use for your arrangement.  For this one in particular, I was arranging for a friend who likes white flowers so I decided to use white flowers as a base with a lot of textured greens.

2.  Make sure you have everything you’ll need:  Container (and liner if your container is permeable), Oasis Floral Foam (for wet arrangements), flower picks with attached wire, floral tape (if you’re using foam to anchor your arrangements, you’ll almost never need tape, but I always keep it handy), pruners, flowers in fresh water.

3.  Cut your foam to the desired size (a knife works for this so don’t get talked into purchasing a foam cutter).  Make sure the foam fits snuggly in the container as to prevent the arrangement from shifting.   Take the foam out and soak it in a bucket of water until it no longer floats.  To speed up the process, sometimes it helps if you poke a few holes through the middle.

4.  Start with your largest flower (I like to use hydrangeas for this type of arrangement) give them a clean cut on an angle and cut away any leaves.  Place the first stem into the foam at one of the corners.  You want the flower to hang partially over the edge of the container.  Fill in the remaining three corners with hydrangeas and put the fifth hydrangea in the center.  When you are finished, you should still be able to see the foam if you look closely.  Make sure they aren’t packed together too tightly to add your remaining flowers.

5.  Choose your next largest flower, in this case it was the white dahlias.  Place them through (not next to) the hydrangeas and into the foam.  Putting them through the hydrangeas spreads the hydrangea buds apart and makes the arrangement more even and consistent.  You don’t want them to get lost in the hydrangeas so allow them to stick out a tiny bit further.

6.  The next flower I used was the ranunculus.  Since ranunculus have really thin and flimsy stalks (unlike hydrangeas and dahlias) it’s close to impossible to stick them into foam without them breaking.  Cut your ranunculus, bunch two of them together with a bud or two and wrap the wire of the pick around them as far down as you can go.  Clip to the desired length and place them into your arrangement.  Put a few of these little bunches through the hydrangeas and a few next to them to start filling in any gaps.

7.  Now on to the greens!  I used Dusty Miller to start because I absolutely LOVE the soft texture and the silvery hue.  Using the floral picks again, bunch 2-3 leaves together and add them to your arrangement.  Scatter several of these bunches throughout.

8.  Repeat with the white thistle (using the flower picks) since they also have really delicate stems.

9.   The silvery pine cone/artichoke looking greenery I picked up from the Flower Mart was referred to by two different names at different vendors: Ellington and Korean Fir.  I’m still not 100% sure what this is technically called, but it was beautiful and had so much great texture.  I scattered a few about in this arrangement.

10.  Lastly, I added some wheat grass to give the arrangement a soft, feathery look.  Follow the same steps as the ranunculus with a floral pic and scatter them throughout the arrangement.  Don’t push your little bunches too far into the foam, but allow them to stick out a little higher than then rest of the flowers to enhance that texture.

11.  Fill in any remaining space with some leftover flowers and voila!  You’re done!

Things to remember when making this type of arrangement:

–  Start monochromatically and move from lightest to darkest.  I always start with the largest flower (or base flower – in this case it was the hydrangeas) and since these were white, I used all of my white flowers first before moving onto the colored flowers and greens.  This allows you to seamlessly move from light to dark without too much contrast.  In my personal opinion, there is nothing worse than a white arrangement with really dark purple or blue buds and nothing to bridge that transition.  Working from light to dark will allow for a great flow of colors and textures.

–  You don’t necessarily need to use everything you have.  In this case, I picked up a few succulents and willow branches, but once I started arranging, I realized that I really didn’t need them for this particular piece.  Don’t feel obligated to use every single stem you buy.  Do what looks best.

If you feel like you’d still like some more instruction (and are in the LA/OC area) I’m happy to offer a crash course on flower arranging… perhaps one weekend over a few glasses of wine?  😉  Reach out if you’d be interested in something like this.  

HAPPY FLOWERING!

Design, Floral Tagged With: design, fashion, floral, flowers, wedding

Katie + Chris

February 7, 2012

How gorgeous is this couple?!  I had the pleasure of doing Katie and Chris’s wedding flowers last fall after meeting her through our mutual friend Tiffany.  After anxiously awaiting the pictures from their big day (my camera was out of battery day of – worst luck ever!), Katie passed these on to me and I was too excited to wait for another Friday to come for a Friday Flowers post.

Now on to the love story!  The perfect pair met while she was Coxswain on the Long Beach State Crew Team and he was her coach – adorable!  The husband-and-wife-to-be were friends for about 4 years before their romance blossomed and now they both work for Los Alamitos schools – she is a speech language pathologist and he works for the auxiliary department.  For their Dana Point nuptials, Katie wanted to stick with a laid back, rustic, nautical, beachy feel (L-O-V-E) and wanted a fairly simple color palate of white blooms and yellow Billy Balls… one of my favorite combos.  Lucky for me, the bride was just as fun as her style and working with Katie and Chris was an absolute delight 🙂

Florals:
{Bride} O’Hara Roses, White Roses, Ranunculus, Dahlias, Gardenias, Billy Balls
{Boutonnieres} Billy Balls, Dahlia (for the groom)
{Bridesmaids} White Roses, Dahlias, China Mums, Spider Mums, Stock, Billy Balls
{Flower Girls & Flower Ceremony} Gerber Daisies
{Table Arrangements} Hydrangeas, China Mums, Spider Mums, Dahlias, Stock, Billy Balls

Venue: Ocean Institute – Dana Point, CA
Photographer: Mark Brook Photographers

Design, Floral Tagged With: California, fashion, floral, flowers, institute Dana Point, ocean, wedding

Friday Flowers – Ana

November 4, 2011

Shortly after Tiffany and Troy’s wedding, I received a message from a girl named Ana who was interested in chatting with me about doing her wedding flowers.  She was a friend of Tiffany’s so I was happy to find out more about what she wanted for her big day.  She was incredibly sweet, full of spirit and I was thrilled to hear that she loved color and what she referred to as “happy flowers”.  However, toward the end of our conversation, I was a taken aback when she told me that her wedding was in November of 2012, not 2011 as I’ve never had someone contact me that far in advance.  She clarified that the reason for this was because she was undergoing chemotherapy for cancer she’d been diagnosed with the year before and just wasn’t sure when she would have good weeks and bad.  She wanted everything set in stone so that she wasn’t enduring too much stress too close to the wedding.  I was completely shocked to hear this as by the sound of her voice, I could have never guessed.  She was just that vibrant, lovely and high spirited.

When I met with Ana in person about two months ago, she looked much worse than I’d anticipated.  She was incredibly thin, but she was just as happy and full of life as she’d sounded on the phone.  Her fiance accompanied her to our meeting and the two of them excitedly showed me around their venue and pointed out their favorite wedding flower clippings pasted to Ana’s inspiration board.  Like most brides, she knew exactly what she wanted:  Absolutely no roses except for one red rose on an empty chair for her father who had passed away from cancer the year before (because those had been his favorite) and tall vases with submerged tulips, orchids and floating Gerber daisies.  I left the meeting excited, but concerned.  She assured me she was doing just fine and she was excited to meet again this November to see a few samples.

On Monday, Tiffany called me to let me know Ana had passed away over the weekend at the age of 28, almost one year after her diagnosis and almost one year before her wedding day.  When we hung up, I completely lost it.  I’d hardly known her, but there was something really special about her.  I wish I’d called her to check in two weeks ago before her condition worsened and I wish I’d had the chance to arrange her “happy flowers” for the happiest day of her life.  Any age is too young to lose the battle to cancer, but 28 with so much life ahead is way, way too young.

In honor of Ana, I could think of nothing more appropriate than for this Friday Flowers to be happy flowers.

Wishing everyone the very best this weekend.  Remember to smile at the little things, find joy in the journey, love with all your might and make every moment count. 

Design, Floral Tagged With: design, flowers, wedding

  • « Previous Page
  • 1
  • 2
  • 3
  • 4
  • Next Page »
  • Facebook
  • Instagram
  • Pinterest

Search

About Meg

subscribe via email

Insta Love

Shop Pillows!

Recent

  • Late Summer Gazpacho
  • 2018 Harvest Party
  • Life Lately: Golden Hour
  • Sauvignon Blanc Harvest / 2017
  • Fig + Prosciutto Salad with Almond Milk Ricotta

Favorites

Follow Along!

  • Facebook
  • Instagram
  • Pinterest

© Copyright 2025. Design.Wine.Dine.. All Rights Reserved. Design by Bloom.